Salesforce
Introduction
This guide takes you through setting up Salesforce for use with Cyclr.
It applies to any Cyclr connectors that use “Salesforce authentication”, such as these:
Salesforce
Salesforce Marketing Cloud
Salesforce Service Cloud
You will require a Salesforce account to create what’s called a Connected App.
If you don’t have a Salesforce account, you can register for a free “Salesforce Developer Edition” account through the Salesforce website.
You can use any Salesforce account to create your Connected App, but note that Sandbox accounts destroy Connected Apps when they are refreshed.
Salesforce’s own documentation on creating Connected Apps can be found here.
Setup & Authentication
Remote Setup
The process of creating a Connected App within Salesforce varies slightly depending on whether you use Salesforce Classic or Lightning Experience.
Salesforce Classic
Log into your Salesforce account.
Select Setup in the top right of the page.
From the menu on the left, go to Build > Create > Apps.
From the Connected Apps table, select New.
Lightning Experience
Log into your Salesforce account.
Select Setup in the top right of the page.
From the menu on the left, go to Platform Tools > Apps > App Manager.
Select New Connected App.
Enter basic information
Whether you are using Salesforce Classic or Lightning Experience, when the New Connected App screen is shown, complete the form as follows:
Connected App Name: enter a name for your application
API Name: this will default to the same value as your Connected App Name
Contact Email: your email address
API (Enable OAuth Settings)
Select the Enable OAuth Settings box to display further options.
Callback URL: you need to add a callback URL so you can use Salesforce in your Cyclr Console and its accounts. The URLs is
https://{YourCyclrServiceDomain}/connector/callback.Selected OAuth Scopes: you need to add the following 2 Scopes to enable Cyclr to use your App:
Full access (full), or if you know which data you wish to restrict, you can select from this list.
Perform requests on your behalf at any time (
refresh\_token, offline\_access).
Require Secret for Refresh Token Flow: make sure to clear this checkbox.
Your OAuth settings should look like the following image:

To enable increased security between Cyclr and Salesforce when authenticating by using Proof Key for Code Exchange (PKCE) you must do BOTH of the following:
In Salesforce: enable Require Proof Key for Code Exchange (PKCE) Extension for Supported Authorization Flows on your Connected App.
In Cyclr: set the Use PKCE? option to “true” in your Cyclr Console’s Partner-level Salesforce Connector settings.
Enabling only one of these options will cause errors when you try to authenticate a Salesforce Connector.
Obtain authentication values
When you save the settings, you need to request access to view the consumer key and secret immediately. To request access, go to the API (Enable OAuth Settings) section and select the Manage Consumer Details button. Salesforce then emails you with a verification code that you can use to reveal the authentication values.
Make a note of the Consumer Key and Consumer Secret values as you’ll need them in order to authenticate the connector with Cyclr.
It can take up to 10 minutes for a new Connected App to be functional in Salesforce, or for changes to an existing one to be set. During this time you may encounter errors when installing the connector:
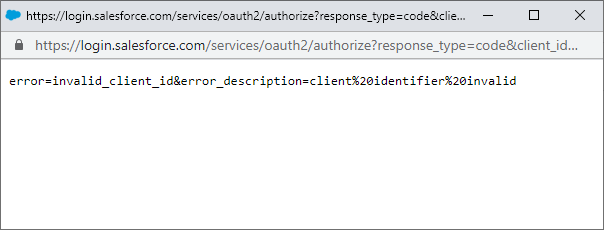
Expired access/refresh token errors
Salesforce only allows up to five unique access/refresh token pairs to be issued for each user in a Connected App. Older tokens will be automatically revoked by Salesforce. More information.
Cyclr Partner Console Setup
Having created a Connected App within Salesforce to obtain a Consumer Key and a Consumer Secret, go into your Cyclr Partner Console:
Go to Connectors > Application Connector Library.
Use the search box to find the Salesforce connector.
Select the Setup Required icon.
Enter the below values:
Value | Description |
|---|---|
Client ID | The Consumer Key from your Salesforce Connected app. |
Client Secret | The Consumer Secret from your Salesforce Connected app. |
Is Sandbox? | Whether the Salesforce accounts to be accessed by the Connector are sandbox accounts or production accounts. true - for sandbox accounts |
Use PKCE? | Whether to use PKCE during authentication. |
Disable Adding Options to Custom Fields? | Whether to remove picklist values from custom fields. true - removes values from picklists for custom fields. Defaults to 'false'. |
Select Save Changes.
If you leave these values blank, they must be provided each time a Salesforce connector is installed.
Cyclr Connector Installation
When installing a Salesforce connector, the user will be taken to a Salesforce login page to sign in and give consent for your Connected App to access their data.
Additional Information
Access custom objects in Salesforce
To use custom objects, you need the API name of your object. The process to find the API name is slightly different depending on whether you use Salesforce Classic or Salesforce Lightning Edition.
Find the API name in Salesforce (Lightning)
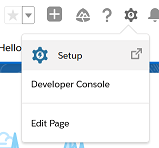
Select the Setup Cog, and choose Setup.
Select the Object Manager.
Note: You can also find the object manager in Platform Tools > Objects and Fields.
Find the Custom Object in the list, and note the API Name. For example, the format is
My_Custom_Object__C.
Find the API name in Salesforce (Classic)
Select Setup.
In the left navigational menu, go to Build > Create > Objects.
Find and select the Custom Object in the list.
Note the API Name of the object on the next screen. For example, the format is
My_Custom_Object__C.
Using the Custom Object in Cyclr


Open the Salesforce Connector settings.
From the Custom Objects > Utilities sub-category, run List Object Fields, and pass in the API Name of your object.
Copy the list of field names from the response.
Select the custom object (from 1-3) that you want to use. For example, you can use the Custom Objects > Object 1 method group to set up access.
Run the List Records 1 method. Pass the API Name as the Object Name, and the field list that you previously copied into the Fields box. This provides you with a sample of data in the object.
Once the method has run, scroll down to the Method Response section of the results and copy it.
On the method, switch tabs from Test back to Fields.
Select the magnifying glass to bring up the Generate Fields window, paste in the response from step 6, and select Generate. This adds all the required fields to your List Records method.
Repeat steps 5-8, but with using the method Get Record By ID 1. If you need an ID to use here, you can run List Records again to find it.
Webhook Setup
Add Webhook class to SalesForce account
Log in into your Salesforce Account, navigate to the top right corner, select the Cog icon, and select Setup.
Navigate to the left panel, scroll down and select Custom Code, and then Apex Classes
Select New to create a new Apex Class.
Name the class Webhook and paste the following code snippet:
  public class Webhook implements HttpCalloutMock {

    public static HttpRequest request;
    public static HttpResponse response;

    public HTTPResponse respond(HTTPRequest req) {
        request = req;
        response = new HttpResponse();
        response.setStatusCode(200);
        return response;
    }

    public static String jsonContent(List<Object> triggerNew, List<Object> triggerOld) {
        String newObjects = '[]';
        if (triggerNew != null) {
            newObjects = JSON.serialize(triggerNew);
        }

        String oldObjects = '[]';
        if (triggerOld != null) {
            oldObjects = JSON.serialize(triggerOld);
        }

        String userId = JSON.serialize(UserInfo.getUserId());

        String content = '{"new": ' + newObjects + ', "old": ' + oldObjects + ', "userId": ' + userId + '}';
        return content;
    }

    @future(callout=true)
    public static void callout(String url, String content) {

        if (Test.isRunningTest()) {
            Test.setMock(HttpCalloutMock.class, new Webhook());
        }

        Http h = new Http();

        HttpRequest req = new HttpRequest();
        req.setEndpoint(url);
        req.setMethod('POST');
        req.setHeader('Content-Type', 'application/json');
        req.setBody(content);

        h.send(req);
    }
}
Add service domain
To add a service domain, go to your Cyclr console:
Go to Settings > General Settings
Copy your Service Domain.
Login into your Salesforce Account, navigate to the top right corner and click the Clog icon, then click Setup.
Navigate to the left panel, scroll down and click Security, then click Remote Site Settings
Select New Remote Site, enter a name and add your Service Domain from step 2.
End user Salesforce Account Setup
For the best experience when using the Salesforce connector, and to reduce the frequency at which Cyclr must obtain a new Access Token and avoid some possible connection issues, you need to set specific session settings.
Log in to the Salesforce organization, go to Setup, then use the Search to find Session Settings.
Under Session Timeout
Timeout Value: Set this for as long as possible, for example, 24 hours.
Force logout on session timeout: Disable this setting.
Under Session Settings
Lock sessions to the IP address from which they originated: Disable this setting.
Disable assignment rules
When you create Accounts, Cases, or Leads in Salesforce, you can prevent the application of Salesforce's active assignment rules. This depends on what assignment rules are setup within Salesforce and the enduser's requirements.
To prevent the application of assignment rules, add this Script to a Salesforce step in the Cycle Builder:
function before_action() {
    // Don't apply Salesforce's assignment rules.
    method_request_headers['Sforce-Auto-Assign'] = 'FALSE';

    return true;
}Working with CSV documents
You can use Cyclr to retrieve the contents of CSV documents:
Find the Document ID in the response you recieve when you make the file, or by run List Content Documents to retrieve the Document ID.
Use the Document ID in a Get Content Version call to get the Content Version ID.
Enter the Content Version ID in a Get Content Document Data (CSV) call.
Add the fields within connector settings so that you can map them. Enter the field location in the format
[].{yourcolumname}
Salesforce Upsert Methods Setup
In order to use the Upsert Account or Upsert Contact methods, you need to set up a custom external ID field within the object in salesforce.
The process to set up the method is slightly different depending on whether you use Salesforce Classic or Lightning Experience.
External ID Creation - Salesforce Classic
To add a custom external ID field to an object in Salesforce, select the Setup button in the top right of the window.
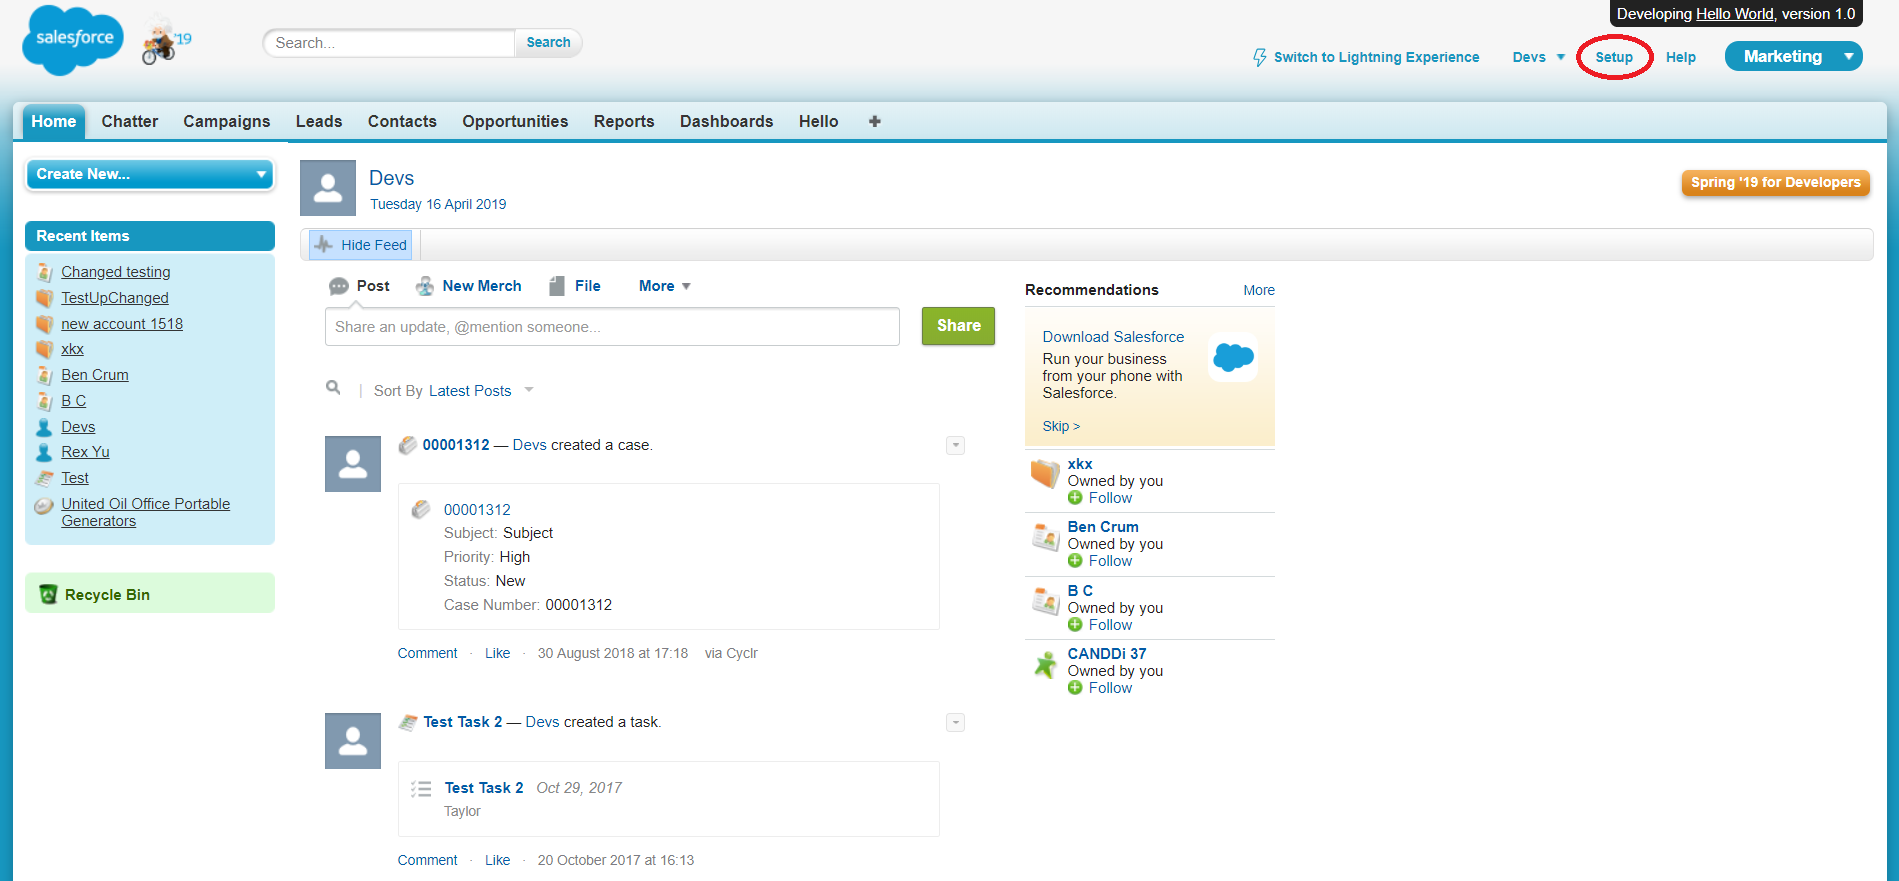
Scroll down to the Build label and select Customize > either Account or Contact > Fields.
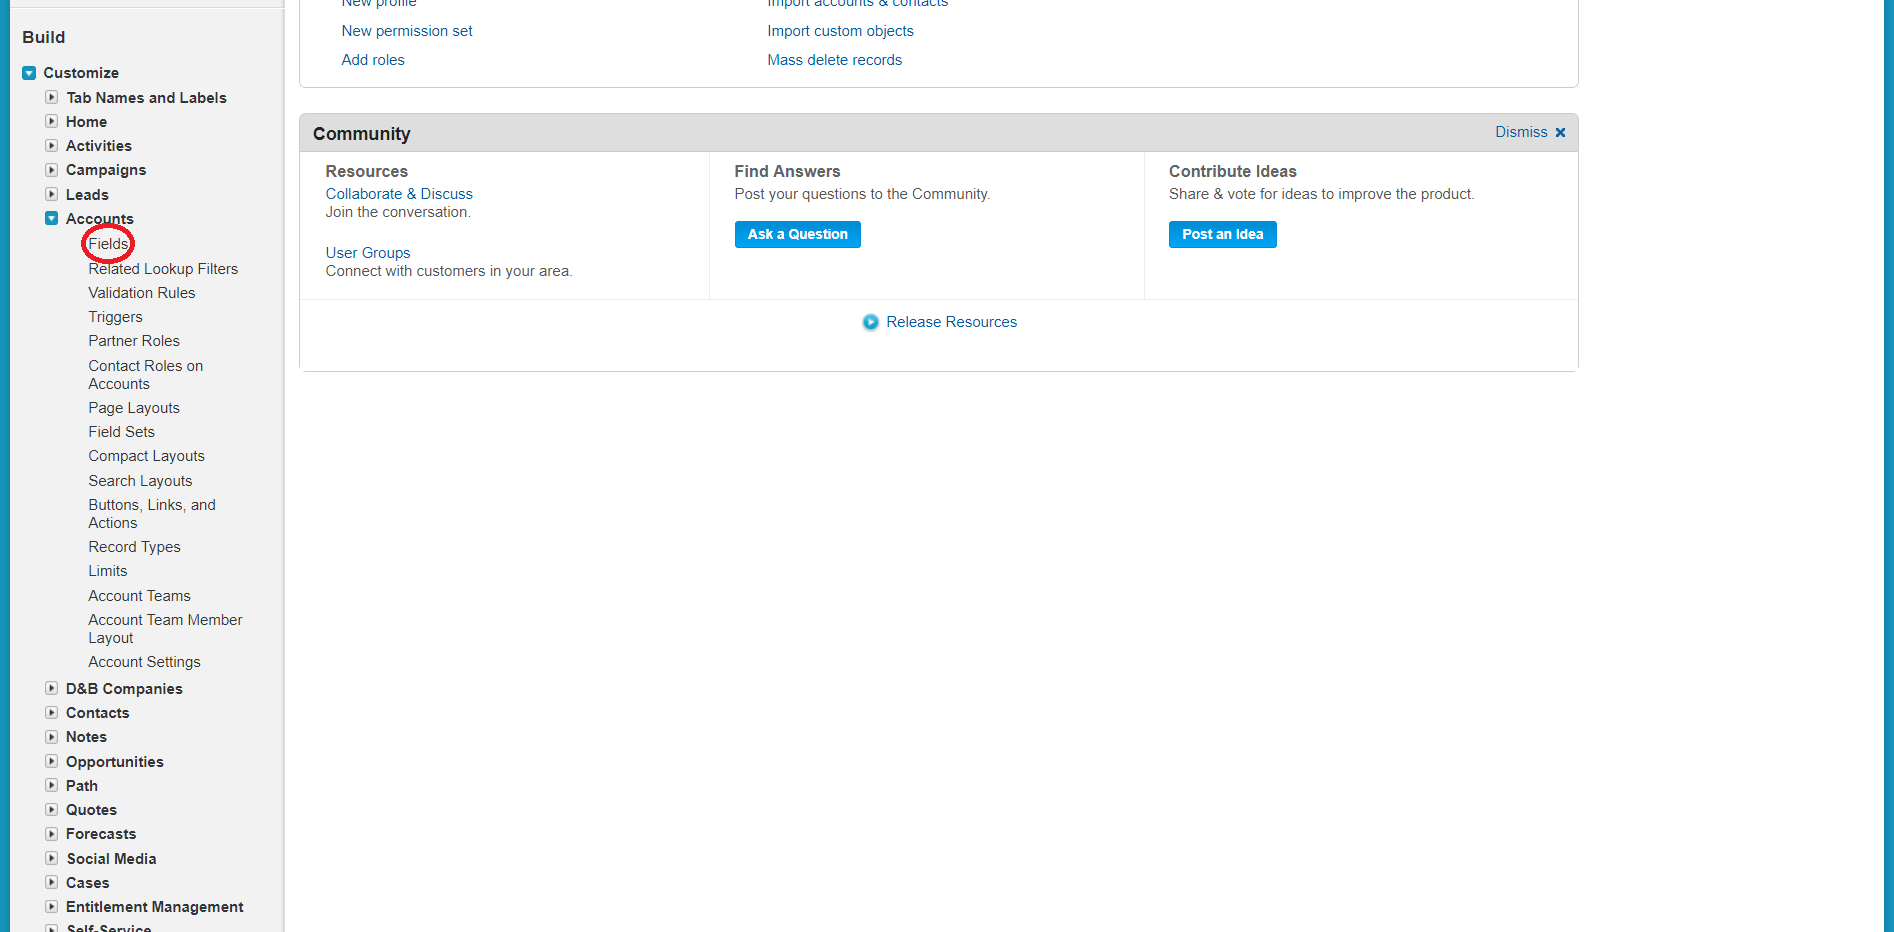
On the Fields screen, scroll down to Account Custom Fields & Relationships and select New.
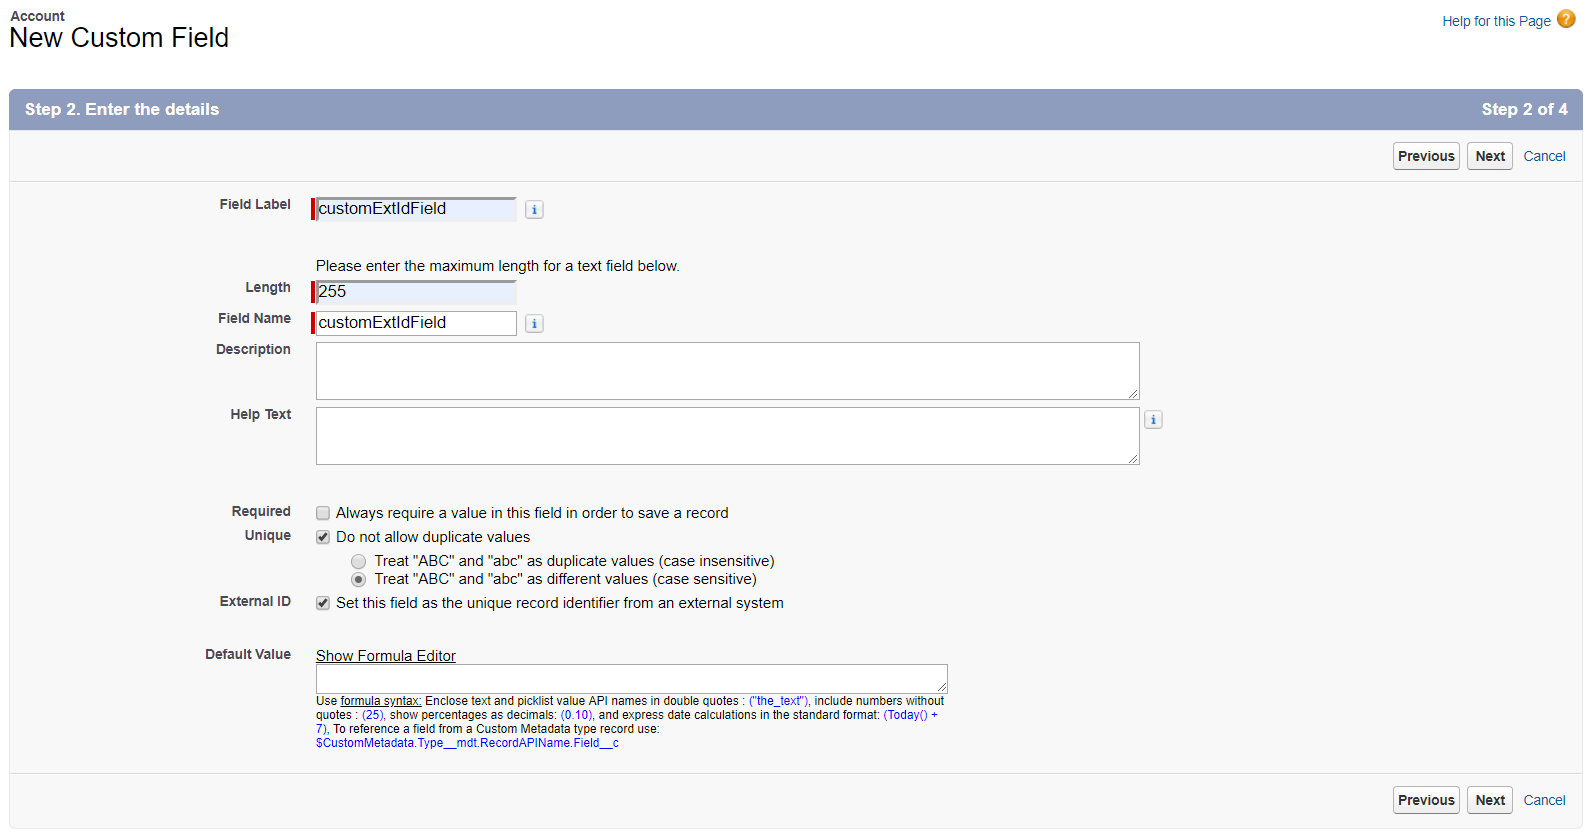
Select the Text checkbox and press Next.
Enter the Field Label and Length.
Select Do not allow duplicate values and Treat "ABC" and "abc" as different values, select Set this field as the unique record identifier from an external system, then select Next.
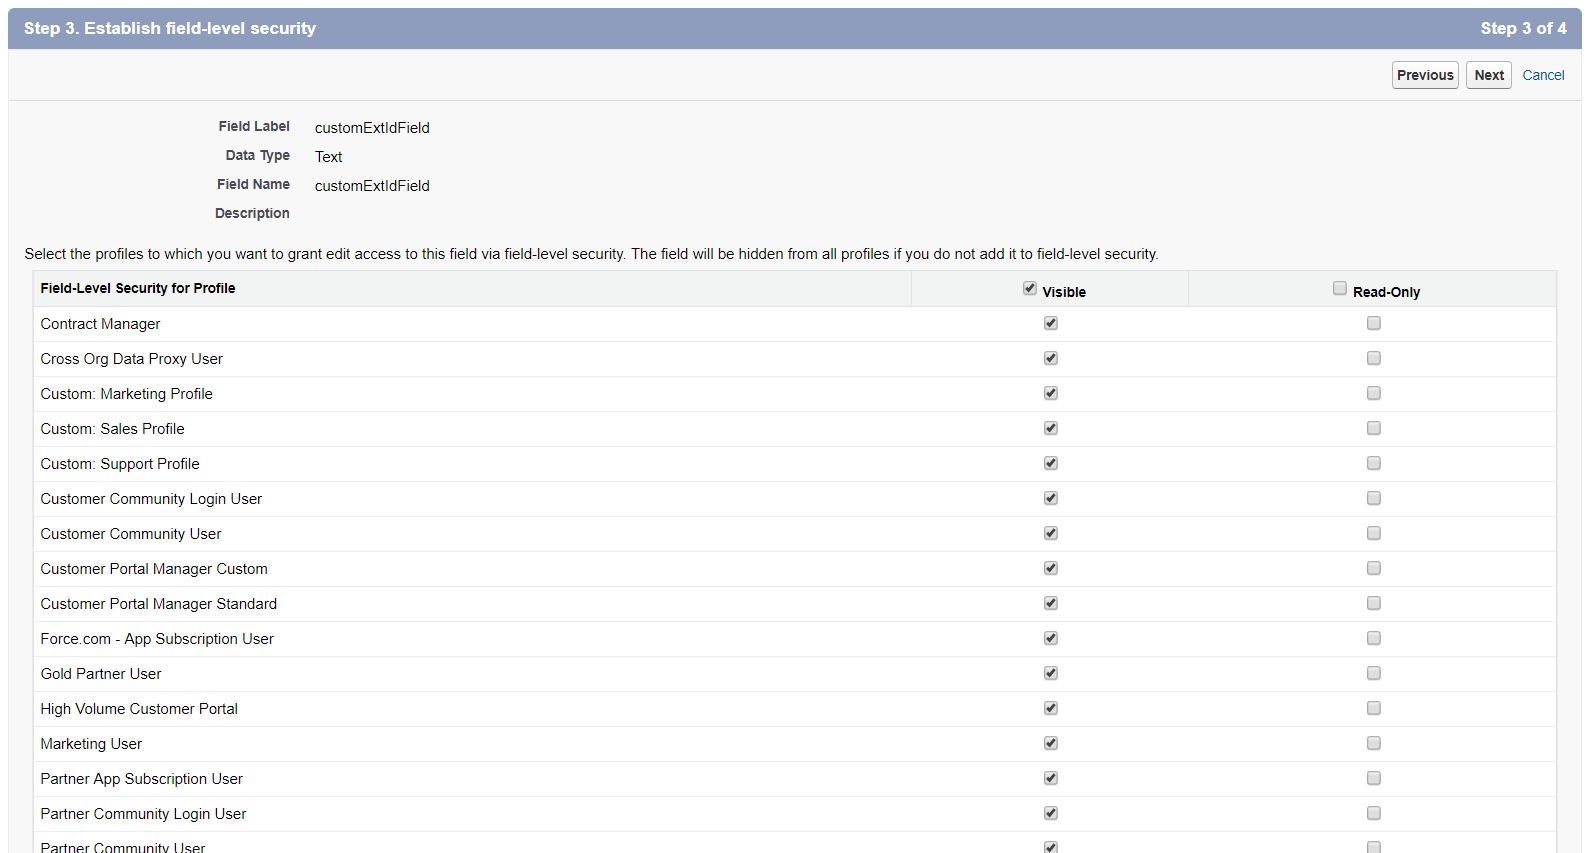
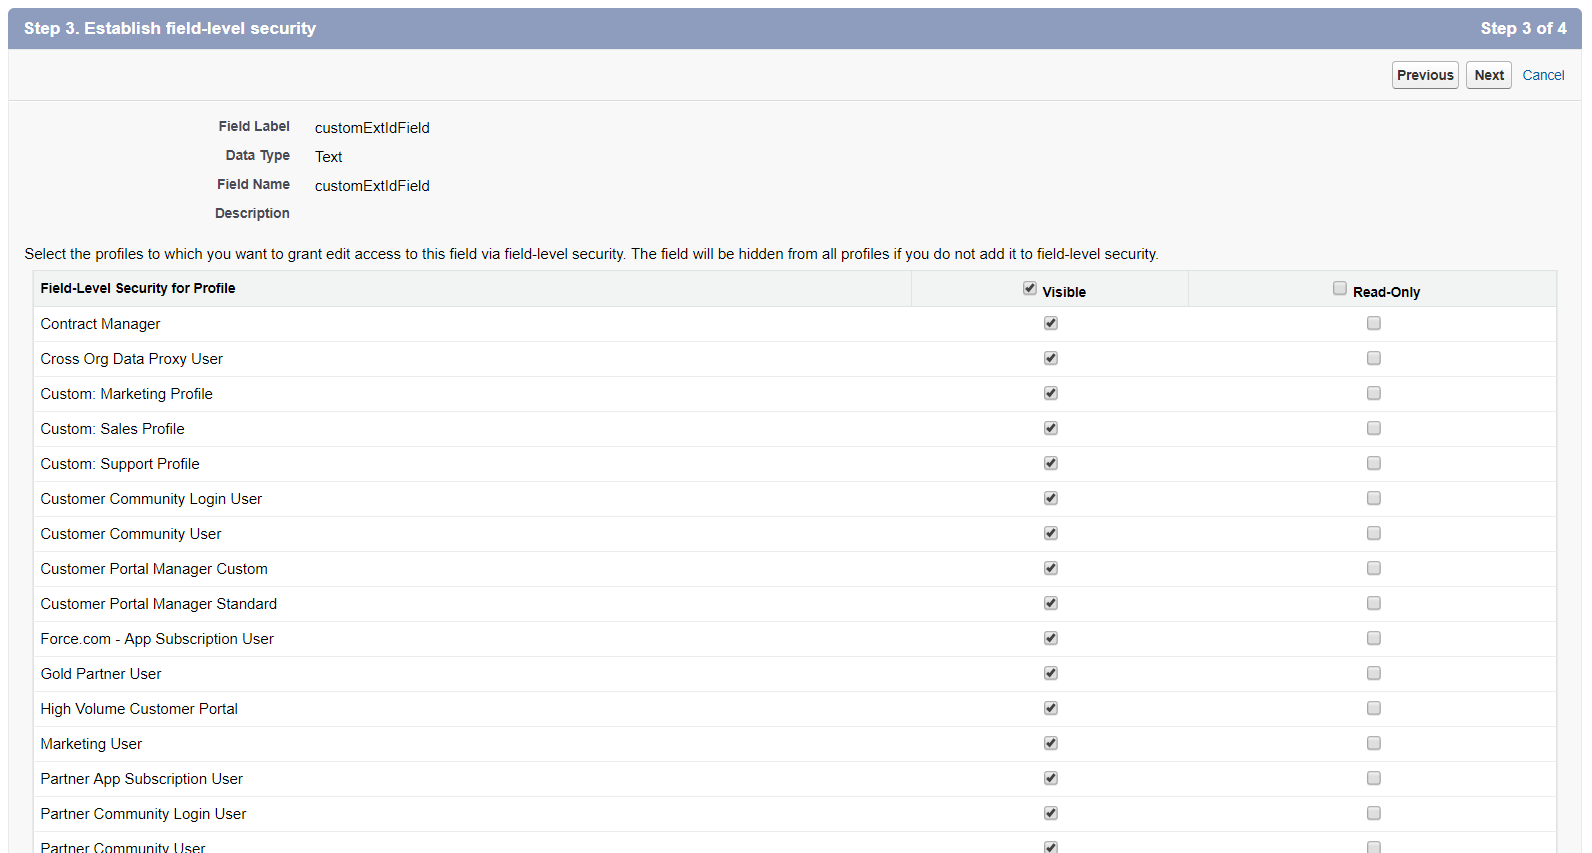
Select Visible and press Next and then Save.
External ID Creation - Lightning Experience
To add a custom external ID field to an object in Lightning Experience, select the Setup cog in the top right of the screen, and select Setup.

Scroll down to the Platform Tools label and select Objects and Fields > Object Manager.
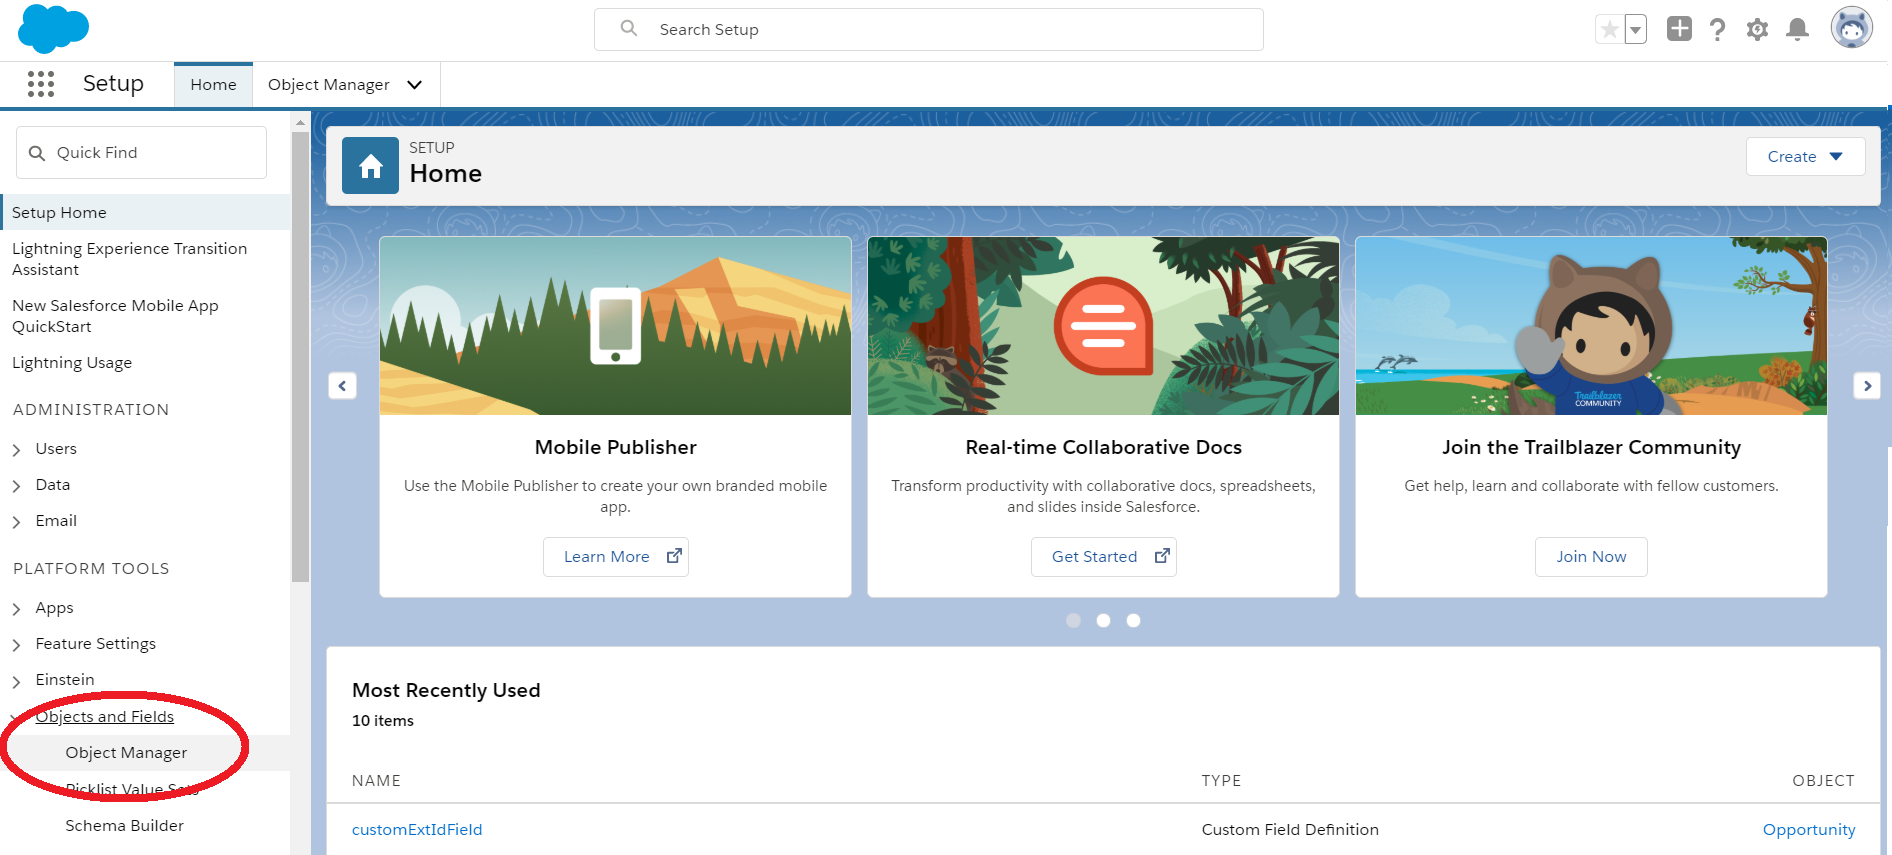
On the Object Manager screen, select the object you want to add an external field for. For example, if you want to set up an Upsert Account method, select Account.

Select the Fields & Relationships from the menu and select the New button.

Select the Text checkbox and select Next.
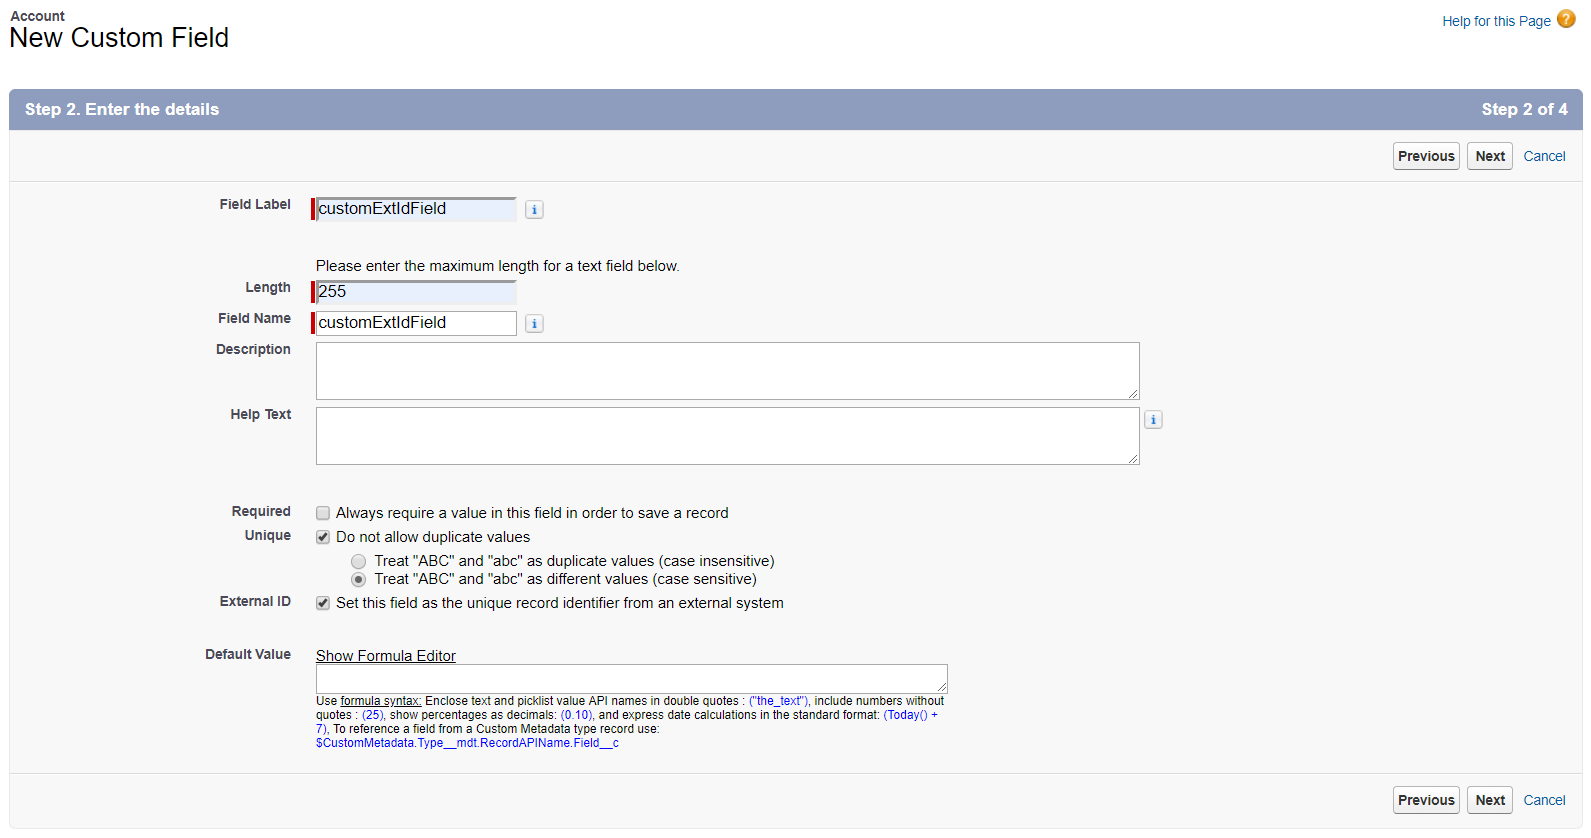
Enter the Field Label and Length. Select Do not allow duplicate values, Treat "ABC" and "abc" as different values., and Set this field as the unique record identifier from an external system, then select Next.
Select Visible, select Next, and then select Save.
Use the Upsert methods
You can use the External ID field you set up to use the corresponding Upsert method.
Copy the API Name of your External ID field from Salesforce:
Salesforce Classic

Lightning Experience

Go to set up the Upsert method in Cyclr, insert the copied value into the External ID Field, and map your External ID value to the External ID field.

Please note that all custom fields for Upsert methods will be set as optional, even if they are set to Required in the Salesforce application. This is to stop users being forced to fill in fields that are not needed when using the update functionality that exists in the Upsert method.
