
SHOPLINE 2.0
Introduction
This guide takes you through setting up SHOPLINE for use with Cyclr, as well as installing the SHOPLINE 2.0 Connector.
Setup & Authentication
Remote Setup
Login to your SHOPLINE 2.0 account.
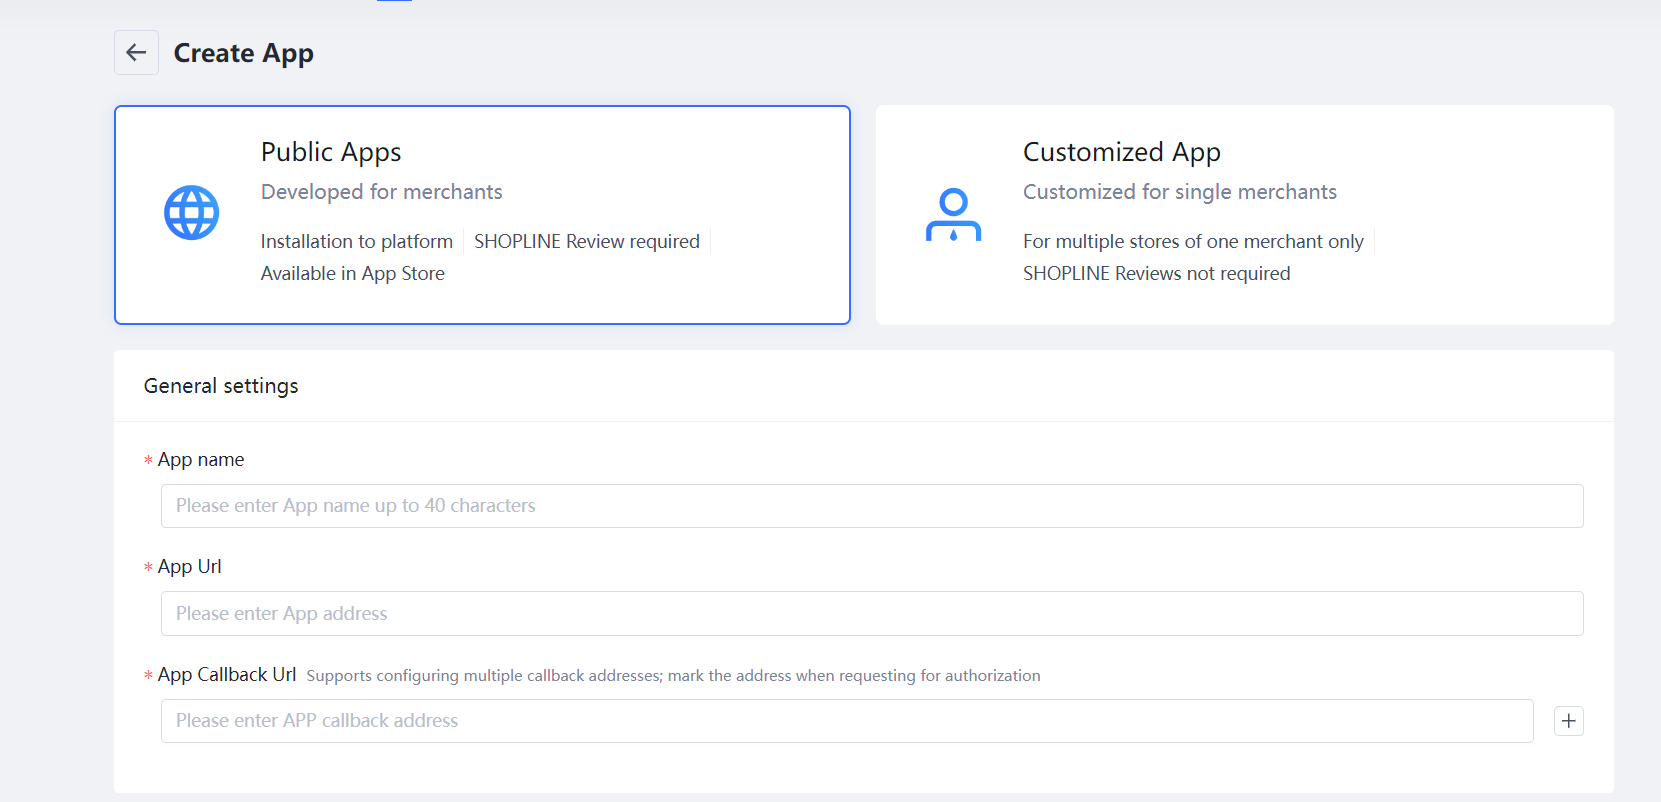
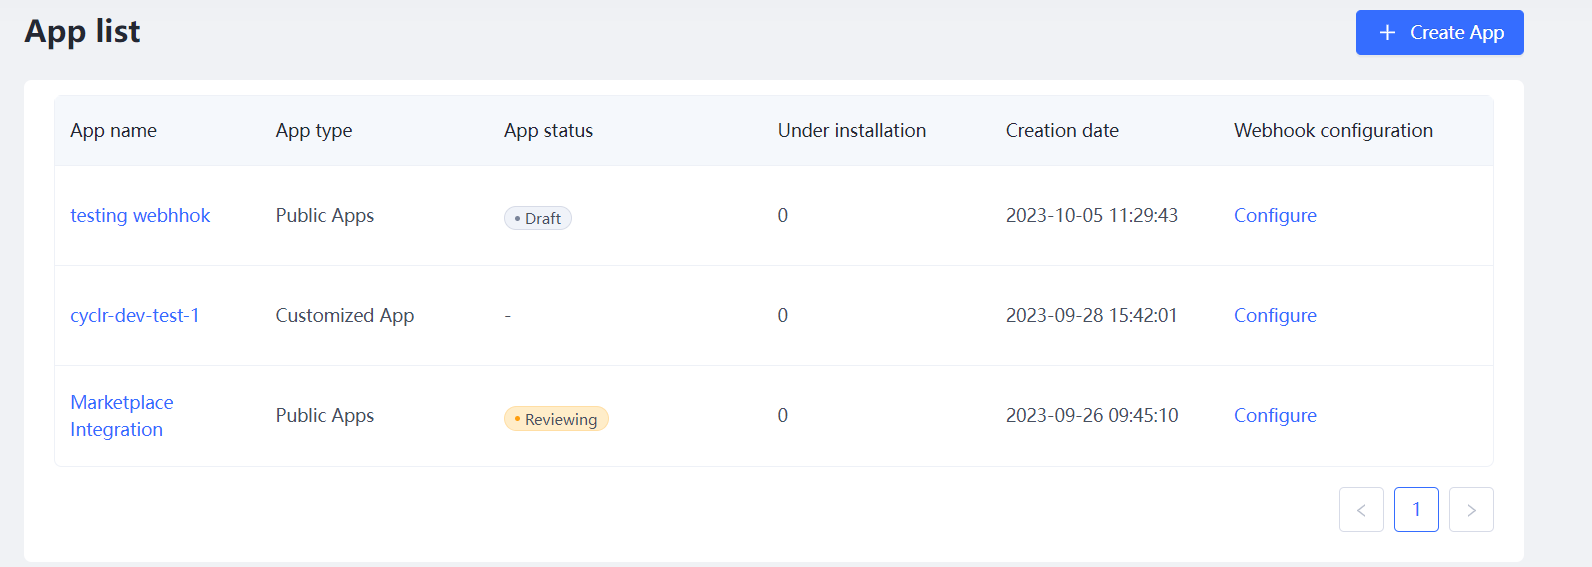
Create a public Application
Log in to the developer platform and click “Create Apps”;

Select “Public App”, then enter the App name, URL, and callback address. Click ”Create”;
In the App list, select your created App;
Click “App Settings” to configure “Contact Information”. Click “Save”;
Click “App Details”, configure language settings then submit for review.
Once the App is created, in the Section Application credentials you can find the credentials that will be needed later on to set up the Cyclr connector:
APP Key
APP Secret
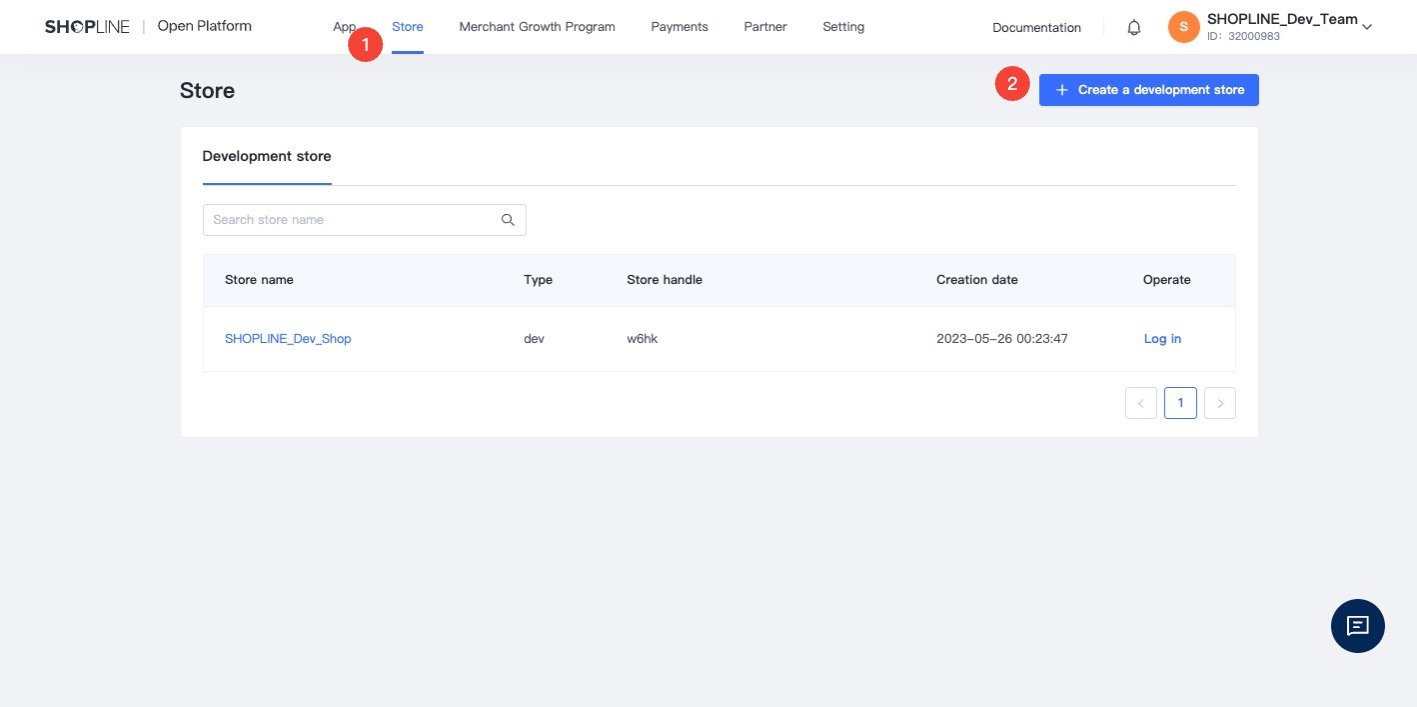
Create a Developer Store
Go to the SHOPLINE Developer Center and select "Store." You will see the option to create a developer store.
Fill in the basic information of the store to complete the creation of the developer store.
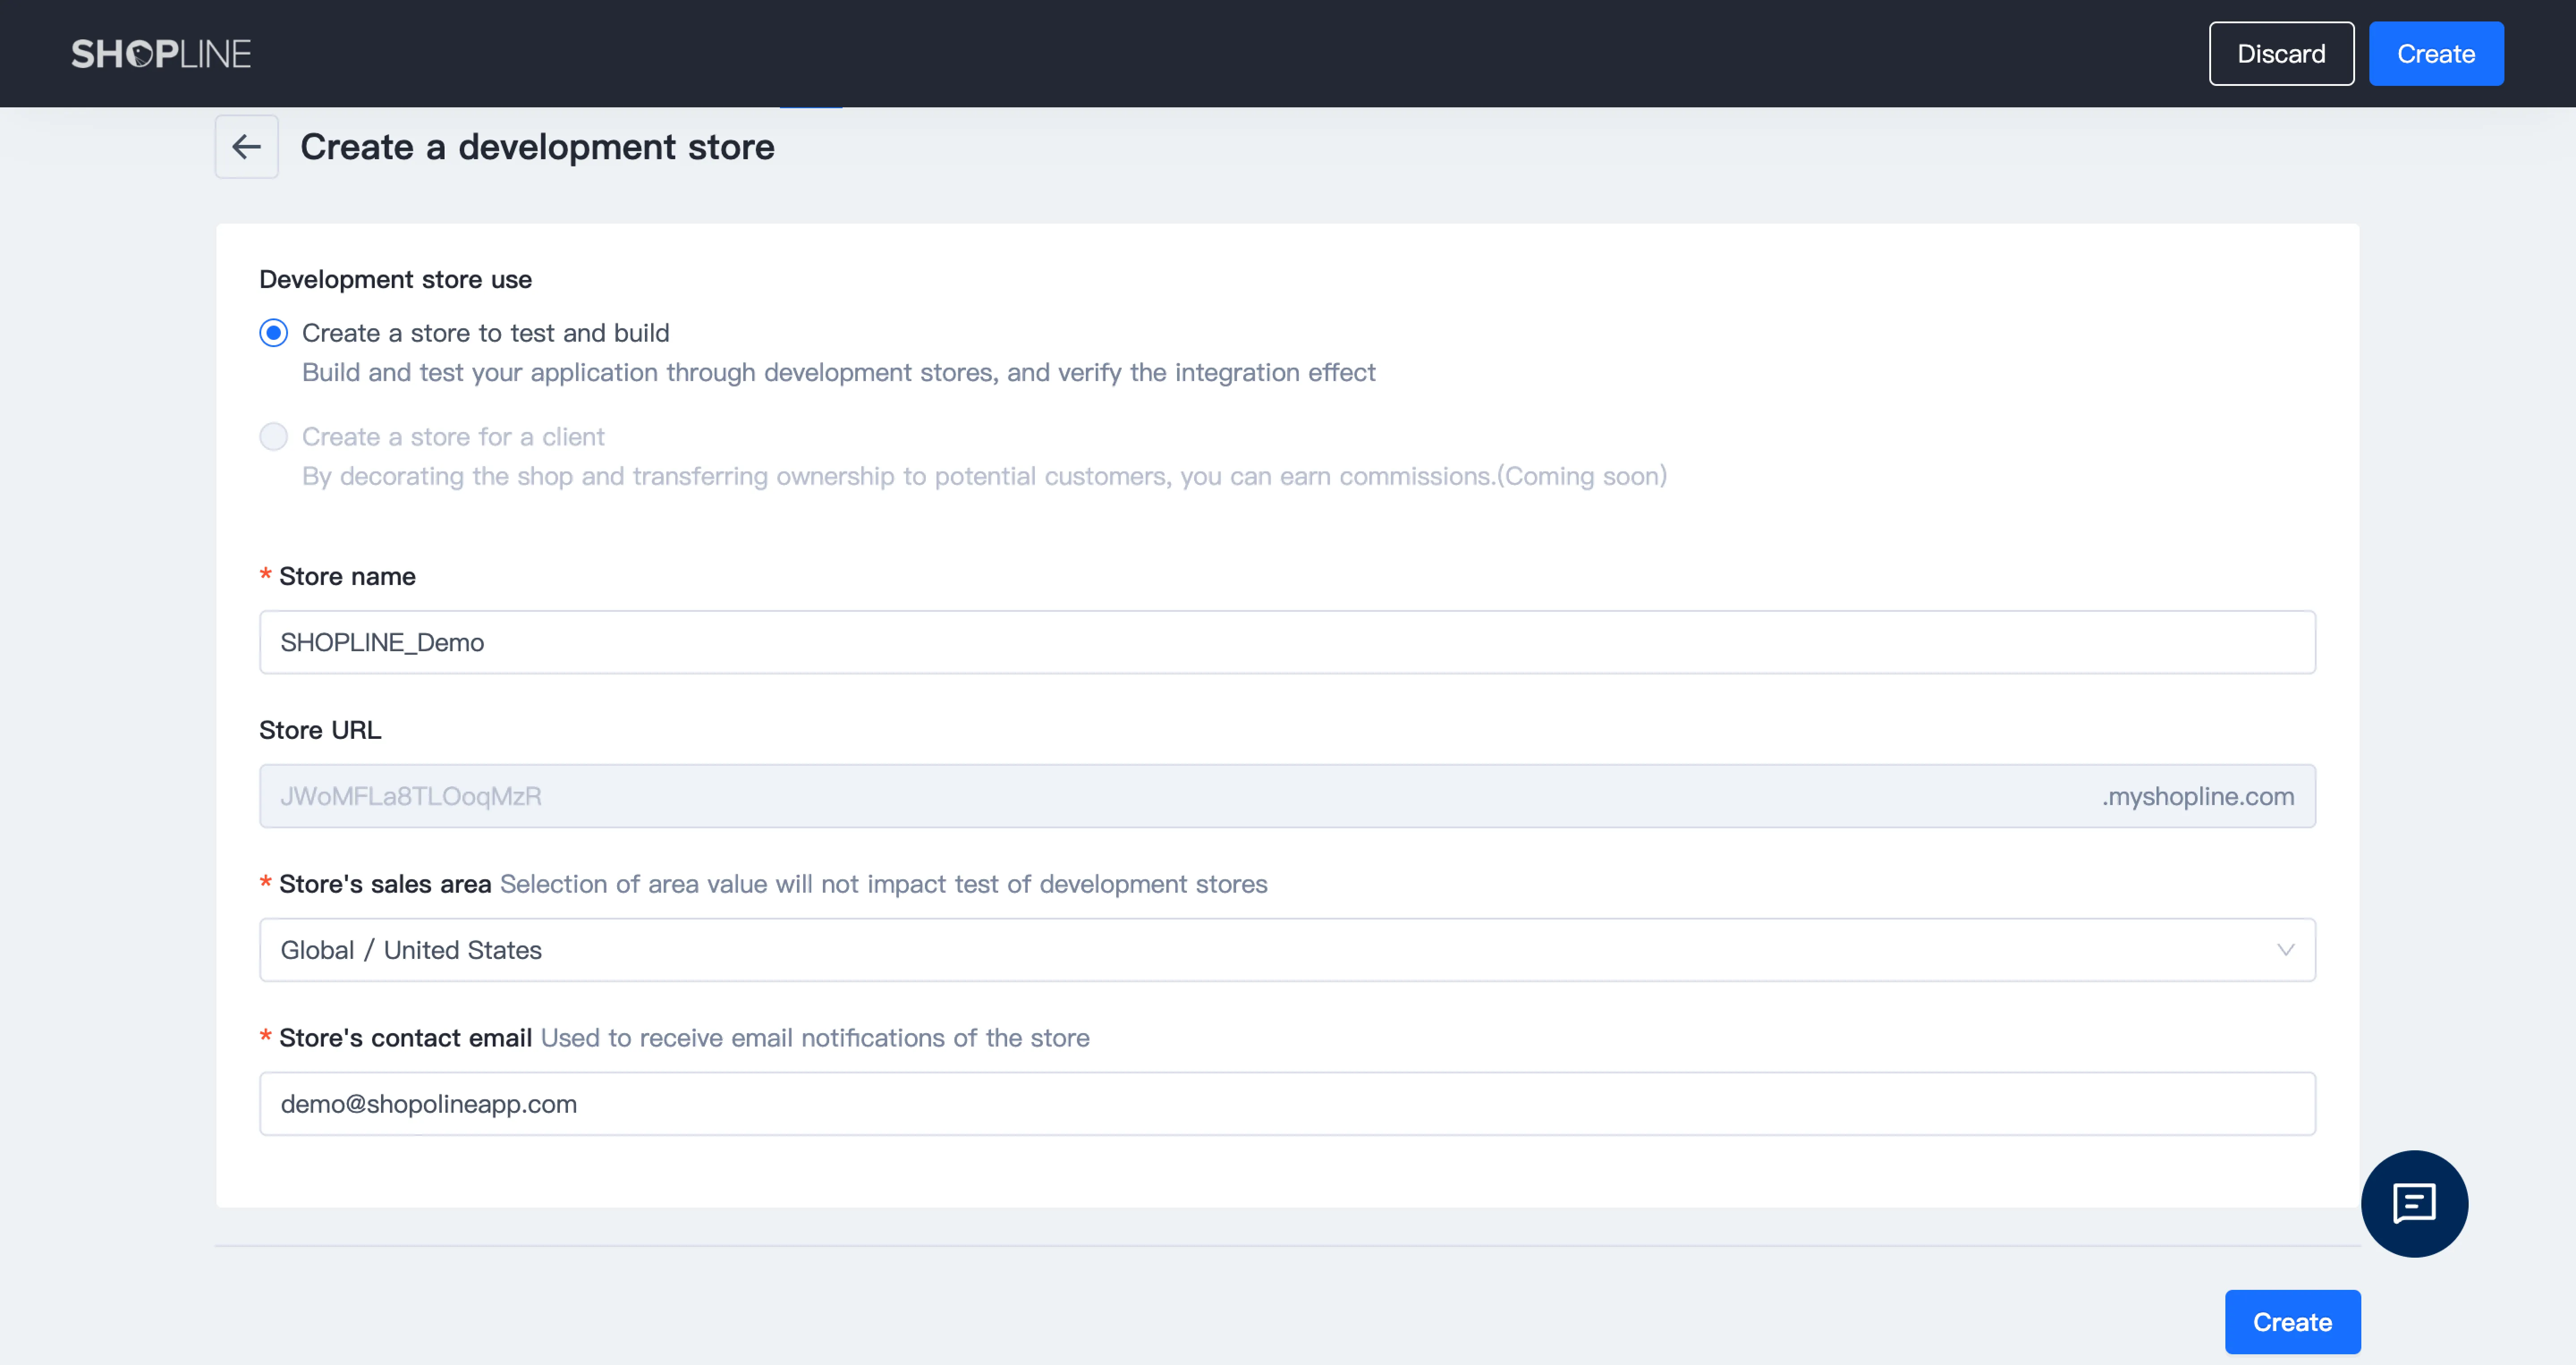
Log in to the developer store, and you will have access to all the store's features.
Once the store is created, you will have access to the Store Handle, needed in the step below.
To test your application using the Developer Store go to https://developer.myshopline.com/docsv2/ec20/3cv5d7wpfgr6a8z5/ksvkehxtudd6d6a3?_highlight=store&_highlight=development
Cyclr Partner Console Setup
Having created an App in SHOPLINE, go into your Cyclr Partner Console:
Go to Connectors > Application Connector Library and search for the SHOPLINE 2.0 Connector.
Select the Padlock button.
Enter your APP Key, APP Secret and Store Handle values.
If you don’t specify a Scope value, Cyclr will default to the following:
read_customers,write_customers,write_inventory,read_location,read_orders,write_orders,read_products,write_products,read_store_informationSelect Save Changes.
If you leave these values blank, they must be provided each time the connector is installed.
Cyclr Connector Installation
When installing the SHOPLINE 2.0 Connector:
Cyclr requires a SHOPLINE Store Handle:
If the URL to the store ishttps://myhandle.myshopline.com, the value entered would bemyhandle.On the next step, the user clicks a Sign In button and is taken to SHOPLINE to sign in and give consent for your application to access their data.
Additional Information
Webhooks Setup
SHOPLINE 2.0 webhooks utilize a single webhook URL, which requires some configuration of your SHOPLINE 2.0 application.
Navigate to your Cyclr Console > Connectors > Application Connector Library > SHOPLINE 2.0 > Setup.
Copy the Webhook URL shown there, e.g.:
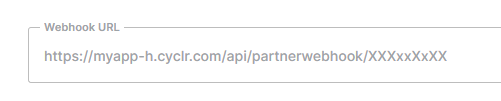
Be sure to use the webhook URL from the Connector’s entry mentioned above.
Don't use the URL from the Step within the Builder as that is only received by that particular Step.
In order to use the SHOPLINE 2.0 Connector’s Webhook Methods, your application must be subscribed to a specific version of an event.
Subscribing to Events
Go to the App section and click “Configure” on the right.
Click on Create Webhook

Configure the events to subscribe to:
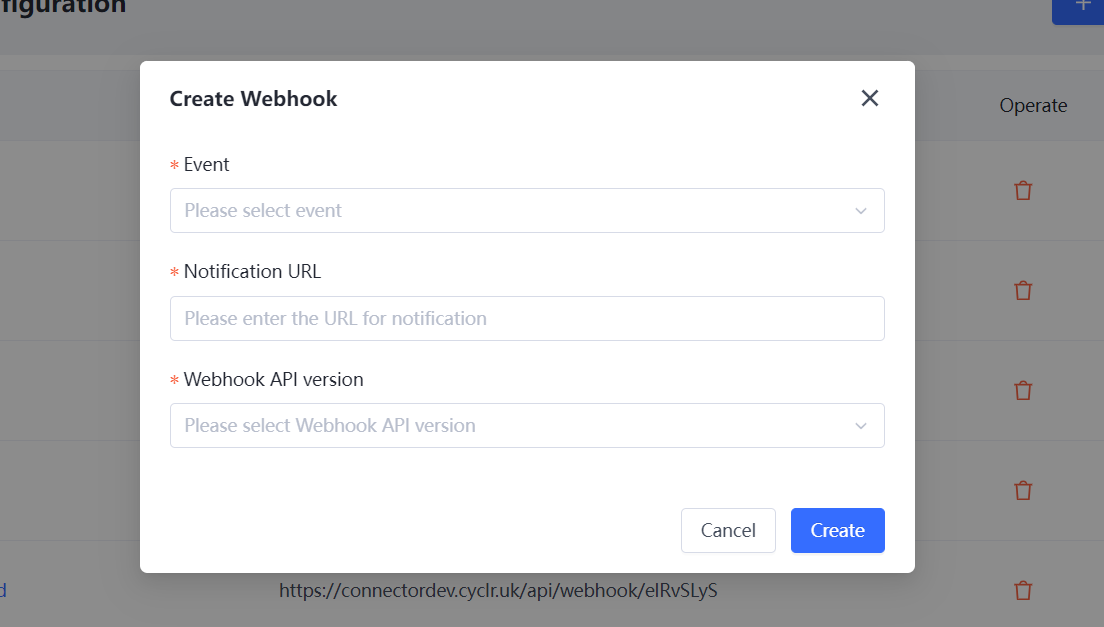
In Event, choose the event that needs to be subscribed to, e.g. “Product Created”.
In Notification URL, enter the webhook URL you retrieved earlier from Cyclr.