
Slack
Partner Setup
Slack uses OAuth 2.0 for authentication so you need to register your Cyclr Partner with Slack to obtain your Client ID and Client Secret values.
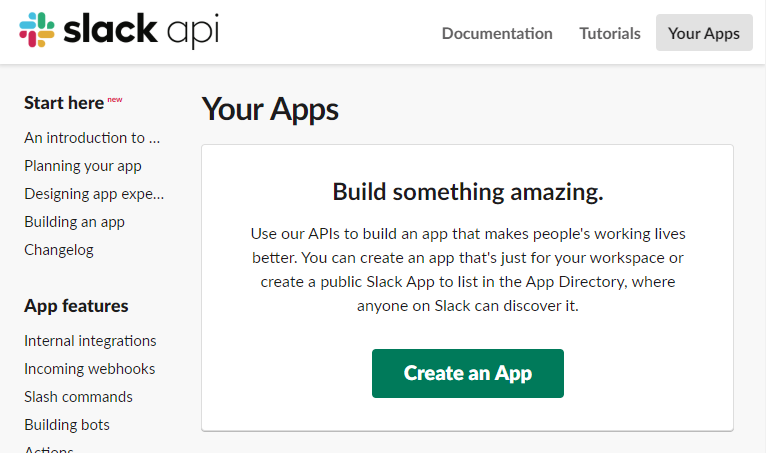
From https://api.slack.com/apps, select the Create an App button, select From scratch then enter the:
App Name - a name for your App. This will be shown on-screen when users install the Slack Connector, and also appear as the username when you post to Slack.
Development Slack Workspace - which Slack Workspace your App belongs to. This just gives it a “home” and doesn’t prevent it from being installed in other people’s workspaces.
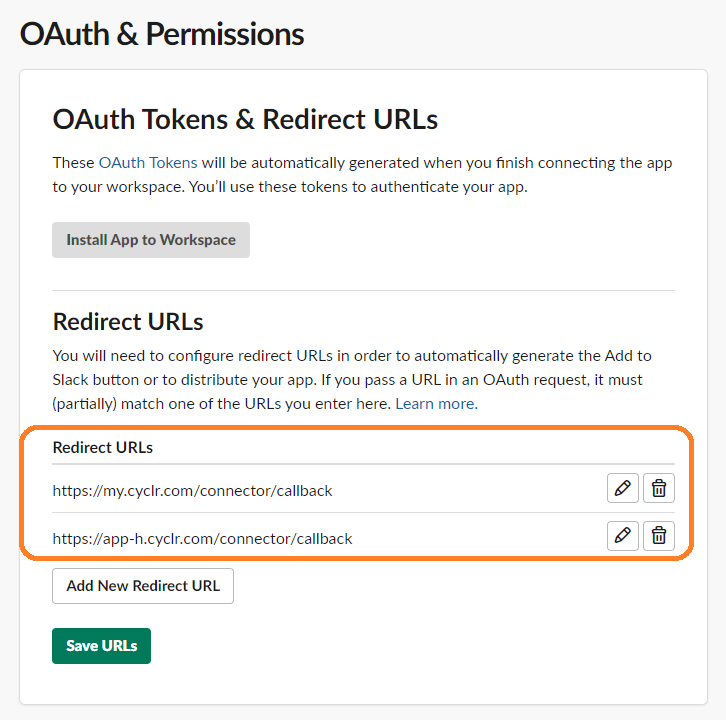
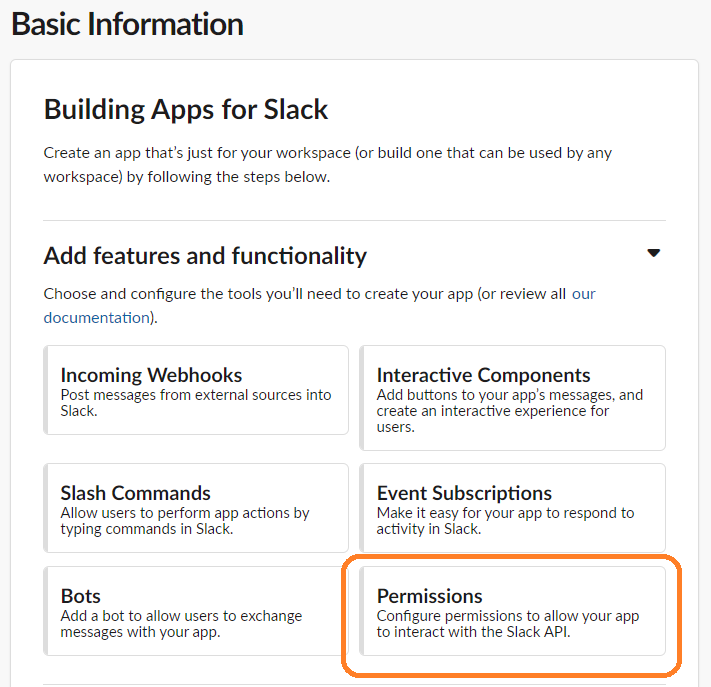
After you’ve created your App, set the Redirect URLs under the Add features and functionality section’s Permissions button:
Redirect URL: you must add a callback URL to allow Intercom to be used in your Cyclr Console and its accounts.
The URL is:
https://{{Your Cyclr service domain e.g. http://app-h.cyclr.com }}/connector/callback
You can find your Cyclr Partner Service Domain in your Cyclr console under Settings > General Settings.
Once added, the redirect URL’s look similar to the ones shown below:
Request Scopes
Scroll down to the Scopes section and click to Add an OAuth Scope. Scopes can be modified at a later stage by navigating to the OAuth & Permissions sidebar.
For example, if you add the chat:write scope to your Bot Token, it allows your app to post messages. If you add the channels:read, your app can access data about public Slack channels.
Note: Add scopes to your Bot Token, not your User Token. You only need a User Token if you need to act as a specific user (for example, posting messages on behalf of a user, or setting a user’s status).
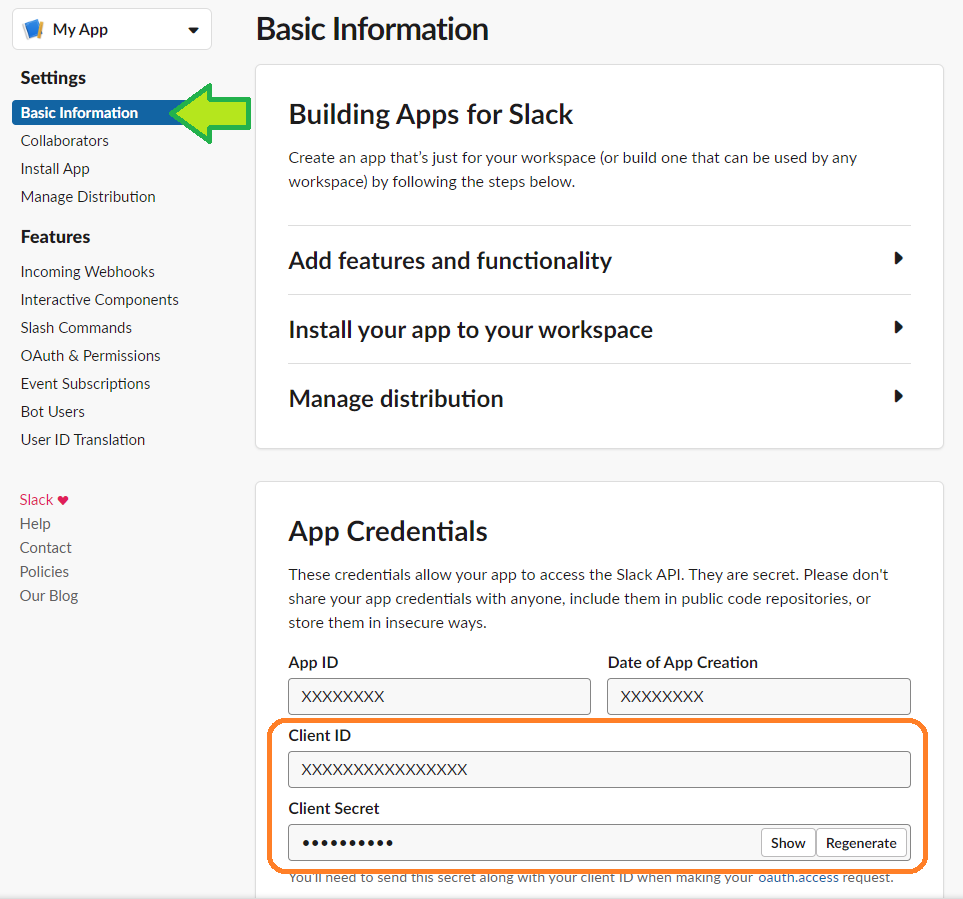
Get authentication details
To retrieve your Client ID and Client Secret values, go to Basic Information on the left then scrolling down to App Credentials.
Distribution (Optional)
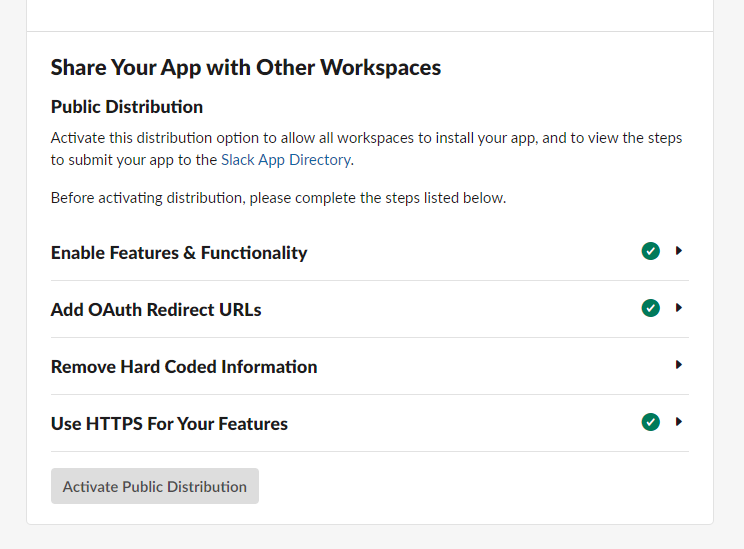
If you want workspaces other than your own to use the app, slack now requires you to activate public distribution:
Navigate to your Basic Information page, select the dropdown for Manage Distribution and select Distribute App.
This screen shows any redirect URLs and features you have setup.
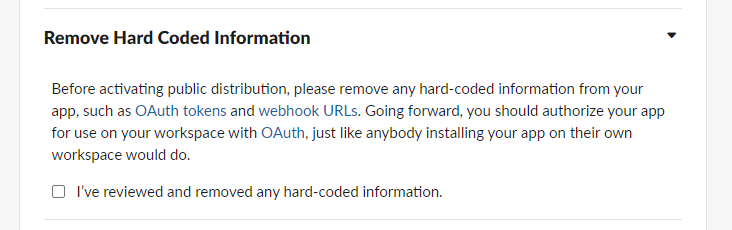
Follow the steps in Remove Hard Coded Information and make sure you select Use HTTPS For Your Features.
Select Activate Public Distribution to make the app available to others, outside of your workspace.
Cyclr setup
To set up the Slack connector in Cyclr, go to your Cyclr console:
Go to Connectors > Application Connector Library.
Use the search box to find the Slack connector.
Select the Setup Required icon.
Enter the below values:
Value | Description |
|---|---|
Client ID | The client ID of the Slack account. |
Client Secret | The client secret of the Slack account. |
Scope | Optional: You can specify scopes instead of using the default ones. |
Select Save Changes.
Note: If you leave any values blank, Cyclr asks for the value when you install the connector into an account. This means you can use different settings for different accounts
Webhook setup
The Slack Connector has webhooks so you can subscribe to File Created and File Shared Slack events. Both of these events can use Cyclr's partner-level single URL webhook target. You can implement either of these into your cycles.
Retrieve the partner level webhook URL
In your Cyclr console:
Open your Cyclr console and log into the correct partner account.
Go to Connectors > Application Connector Library in the top menu bar.
Use the search bar to find the Slack Connector.
Click the Setup Required padlock icon.
Make a note of the Webhook URL. This is your partner-level webhook URL for the Slack Connector.
Setup events in Slack
On the Slack API App page for your Slack App. You can find Slack's documentation on this here:
Select Event Subscriptions in the left-hand menu.
Set Enable Events to On.
Enter the webhook URL found in the previous section in the Request URL field. You will see a green Verified if the URL is valid.
Select Subscribe to bot events to expand out the section.
Select Add Bot User Event.
Enter the event name corresponding to the webhook you will use. You can add both at once if needed:
file_created for the File Created webhook.
file_shared for the File Shared webhook.
Select Save Changes at the bottom of the page. Any scopes missing from your Slack App are automatically added based on the events you entered.
Setup the webhook in a cycle
In the cycle where you want to add the webhook, drag the File Created or File Shared Slack webhook onto the cycle builder and connect as normal.
You do not need to use the webhook URL from the webhook step as all requests will arrive there via the partner-level webhook URL you set up.