
Create cycle templates
Install connectors
In order to build a Cyclr Template you first need to install connectors. You can do this from the builder. If this is your first Template, you will be directed to the connector store in order to get started.
To install a connector from the template builder:
Select Application Connectors from the sidebar on the right side of the window.
Select Add Application to install a new application connector.
Use the search bar to find the connector you want to install and select Install.
Enter a name and description to help you identify the connector.
To authenticate the connector, select Next and enter the authentication values you want to use.
There are two types of connector available. Application connectors work with many popular SaaS applications. Utility connectors are provided to help in the construction of your integrations.
If you want to test a Template, you will need to authenticate the connectors that have been used in order to allow Cyclr to connect and transfer data. If you are just experimenting, you can skip the authentication step and install with the connector without authentication. However, we strongly recommend that you thoroughly test your Templates before they are published.
Authenticate a connector
There are different types of authentication. Depending on the connector you wish to use, the application may require any of the following:
OAuth – login using your account and give permissions
An API key
Username and password
No authentication, e.g. for webhooks
For more information on authenticating a connector, see the API authentication page.
If the application uses OAuth authentication, then you will need to get a Client ID and Client Secret. The way in which this is done differs application by application, and there is documentation provided about what needs to be done. Although you can add the Client ID and Client Secret when the connector is authenticated in the builder, the recommendation is that they are added to the connector by going to the Application Connector page and clicking on the ‘pad lock’ symbol.
For the second part of the OAuth process you will be handed off to the application to which you are connecting to complete the process by entering your Username and Password.
For the other authentication methods, the connector installer will take you through the steps required in order to complete the authentication.
Once you have authenticated your connectors, you will be returned to the builder. Your new connectors will be installed in the sidebar ready to use.
Trigger Step
A trigger is the first step in your cycle; the event that causes the process to start.
To add your trigger, click on the name of the app in the right sidebar. This will reveal different categories of step. Clicking on the name of a category will then reveal the steps that you can use.
There are two types of trigger:
‘Get’ triggers which will connect to the app on a timer to get data
Webhooks which wait for data to be sent to them
Choose a trigger, then click and drag it onto the builder canvas to the right. Once on the canvas, the buttons on Get triggers are marked with green, while webhooks are marked with grey.
Once you have added a trigger, click on its cog button in order to set it up.
Depending on the type of trigger you have used you will need to setup some of the following:
Interval: how often the trigger will run
Mappings: for example, a get trigger may allow you to be more specific about what you wish to get (these contacts, this mailing list, etc)
Webhook URL: you may need to paste this back into the app you’re connecting
Add More Steps
With a trigger now setup, you need to add an action: the step that will be taken after the first step runs.
Action steps display as blue in the builder and include some of the following:
Add contacts
Send a message
Create a task
Click-drag an action step onto the builder’s canvas, dropping it near your trigger step.
Next, click-drag the dot on the right side of the trigger and drop it onto the dot on the left side of your action. The steps should now be joined.
Note: Steps may be grayed out to indicate that there are required fields to fill out in order for the step to work.
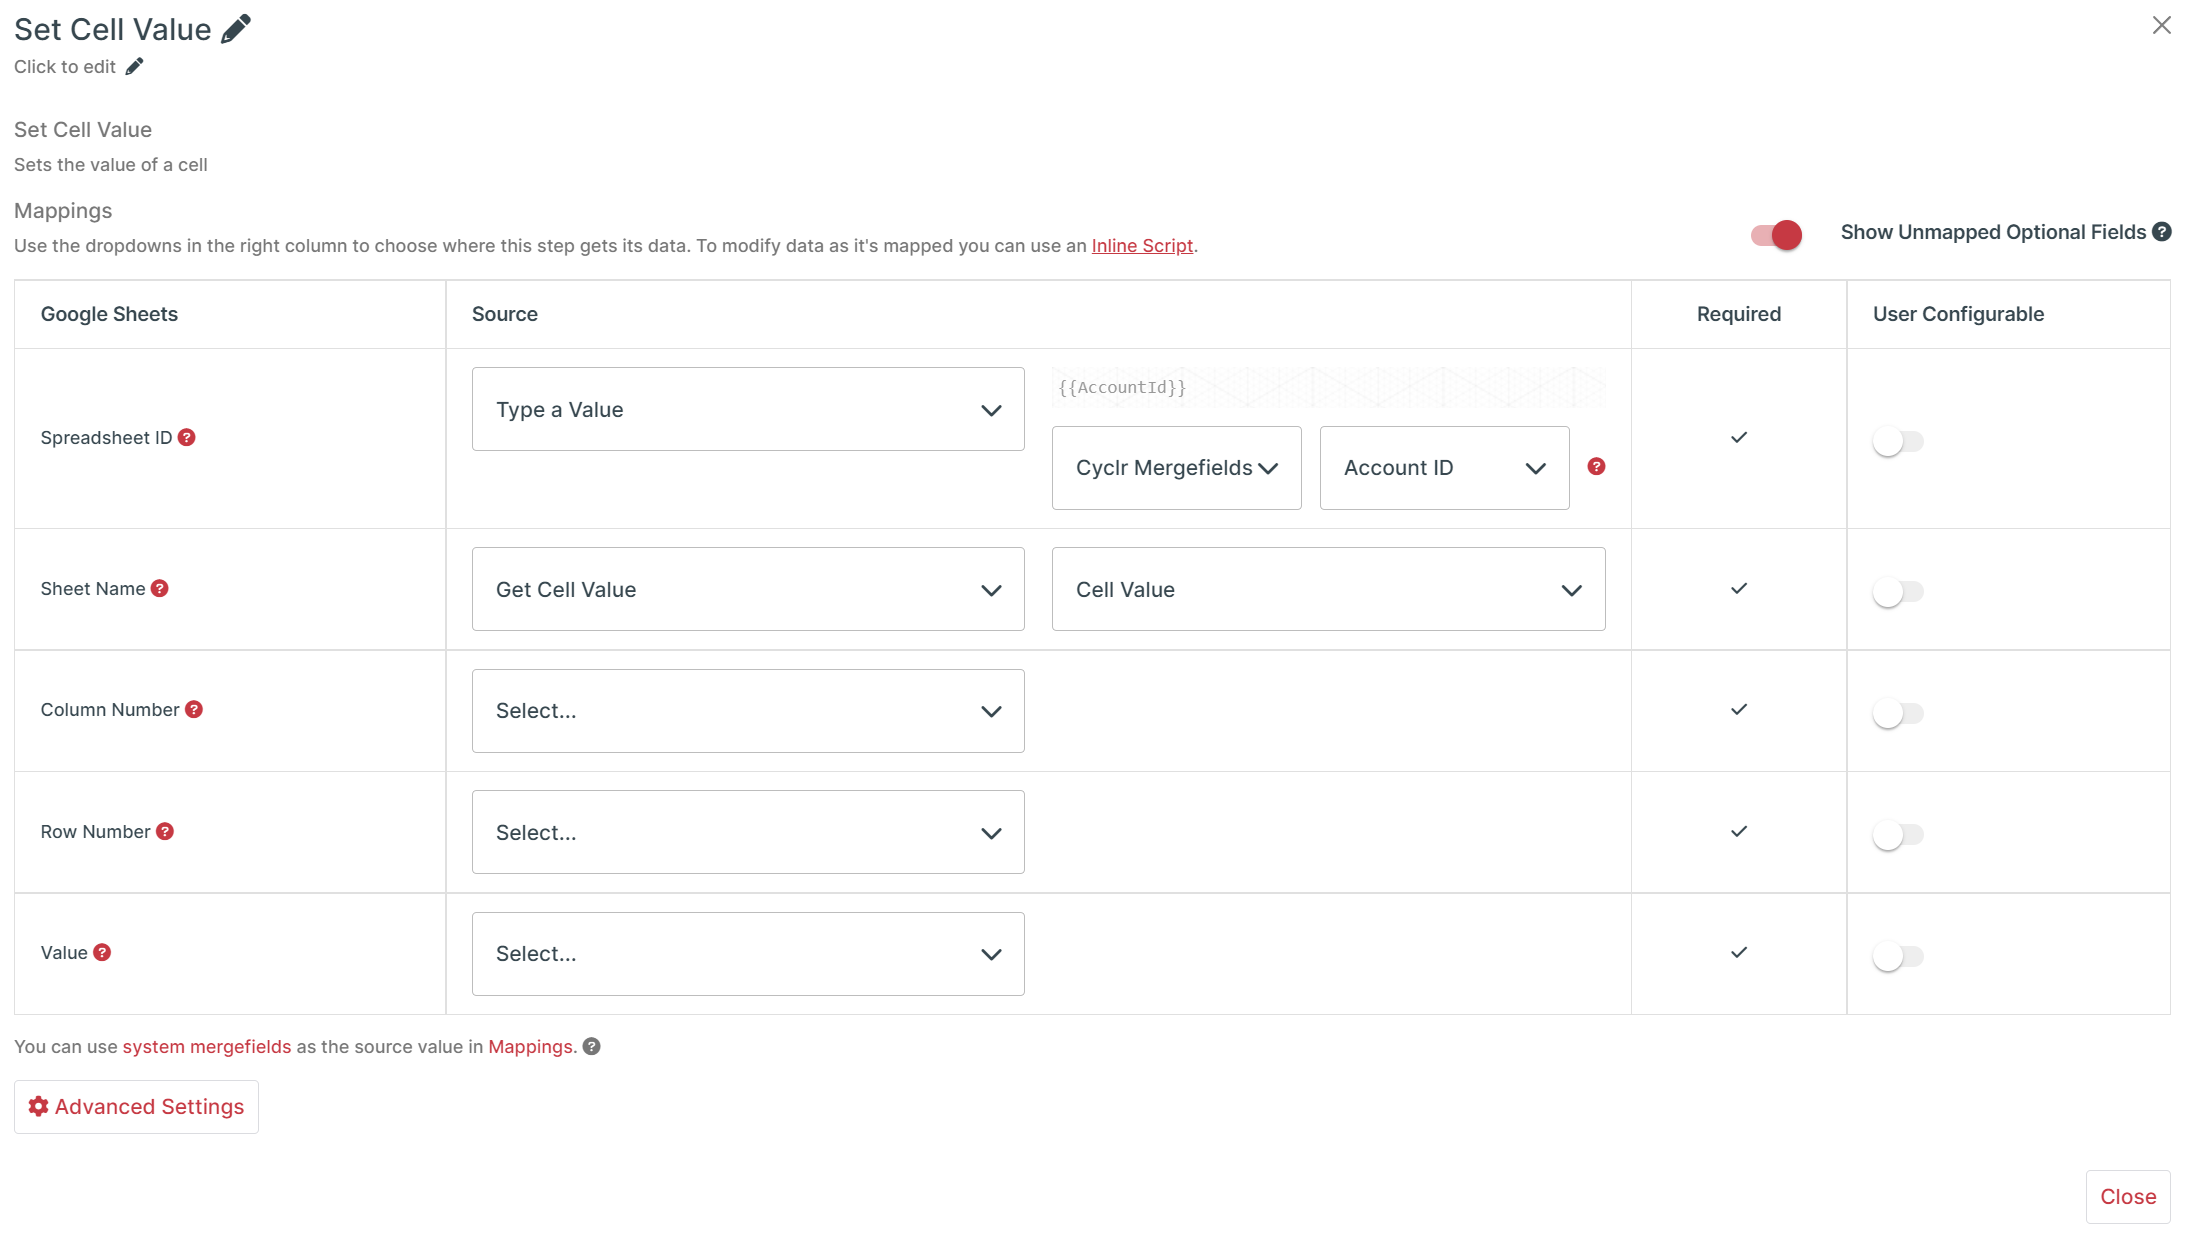
Map fields
With the two steps joined, you should now click the Step Setup button on your action step to and perform the setup and field mapping.
The left most column contains the fields for current step you are setting up. In the right column, you can choose where this app’s field data comes from.
Any previous step’s fields are available to you. In addition, you can type values, look up values, or select default values provided by the app.
Fields marked with a tick are required and must be mapped.