
Google Authentication
Google Partner Setup
Google makes use of OAuth 2.0 for remote API access. You must register Cyclr with Google as your own Project to receive OAuth Client ID and Client Secret values to enable Cyclr to authenticate with Google.
For your reference, here is a link to Google’s own documentation.
Before you start
To set up access for the Google connector, you need to provide your Cyclr Service domain. To view your service domain in your Cyclr console, go to Settings > General Settings and see the Service Domain field.
Important: In order for Google to verify your project, you need to add your own custom service domain. If you change your service domain, you need to re-authenticate any existing Google connectors.
Registering Your Application
Create a Project
Sign up for a Google account, or log into your existing account if you have one, then go to the Google Developers’ Console to create your Project, and enable the relevant Google APIs.
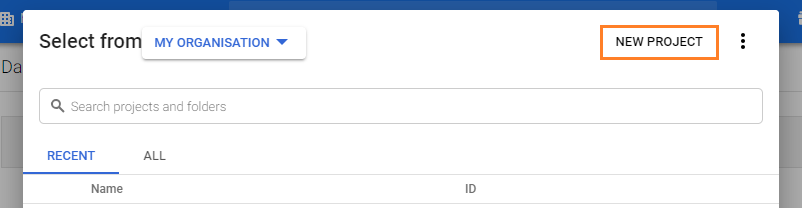
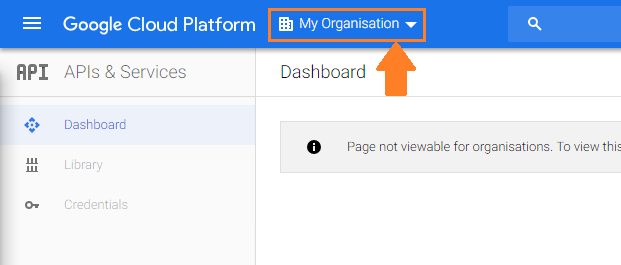
Step 1 - Click your organisation name at the top to open a popup showing your existing Projects, if any:
Step 2 - Take the option to create a NEW PROJECT in the top right:
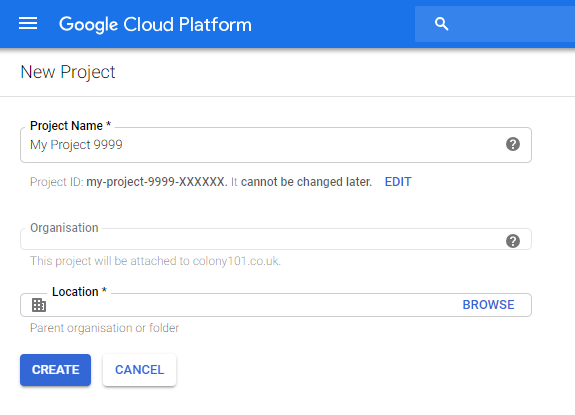
enter a name for your Project, perhaps the name of your product, and optionally set the Project ID to something other than the suggested value:
Setting up Application Details
From the the APIs & Services Dashboard:
Step 1 - Choose OAuth consent screen on the left - values you enter here will be shown to your users when they authenticate a Cyclr Google Connectors.
Step 2 - set Application Type to External.
Step 3 - Enter a suitable name for your application, e.g. “My Product Integrations”, upload a logo, set an appropriate email address for your users to get in touch through, should they need to.
Step 4 - under Authorised domains add your Cyclr Partner Service Domain found in your Cyclr Console under Settings > General Settings, then click Save and Continue.
If the Google Console shows an error for that, remove the subdomain part to leave only the Top Level Domain, such as cyclr.com, e.g. change mysubdomain.cyclr.com to just cyclr.com.
Step 5 - On the next page, you can leave the default Scopes so click Save and Continue again.
Step 6 - Provide values for the 3 “link” options to enable users to find out more about your organisation/product.
Creating Google Credentials
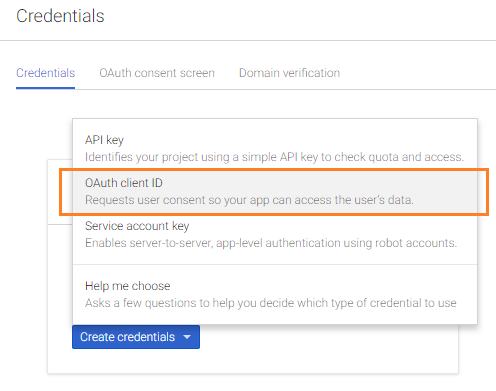
From the APIs & Services Credentials page:
Step 1 - Click the ‘Create Credentials’ button and select the option to use ‘OAuth client ID’.
Step 2 - The Application Type is ‘Web application’.
Step 3 - Enter a Name for the OAuth 2.0 client ID that’s being created. This name is only used to identify the client in the console and will not be shown to end users.
Step 4 - Under Authorised redirect URIs add the following (explained earlier in Before you start):
https://[Your Cyclr Service Domain]/connector/callback
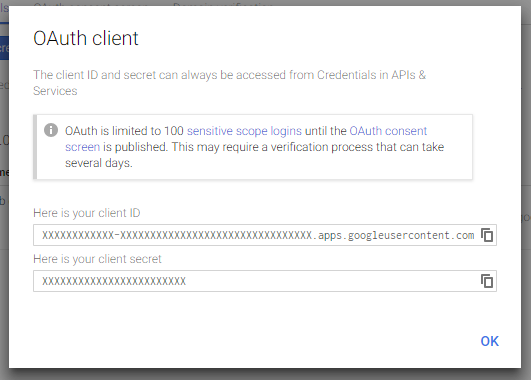
Step 5 - Click the Create button, you’ll then be presented with your Google Project’s OAuth client ID and client secret which you should note for later use:
Enable Google APIs
Google’s services (Sheets, Gmail, Calendar, etc) are offered as separate APIs which you must individually enable within the Google API Console for your Project.
Which APIs you enable depends on which Cyclr Connectors you wish to work with, and some Connectors require more than one Google API to be enabled for them to be fully functional.
For example, the Google Sheets Connector requires you to enable the Google Sheets API and the Google Drive API. If you only enable the Google Sheets API, Cyclr will be able to work with data within a Spreadsheet, but it won’t have access to list the available Spreadsheets to choose from.
For each API you require, follow these steps:
Step 1 - From the Google API Console, go to APIs & Services.
Step 2 - On the Dashboard click the +ENABLE APIS AND SERVICES button at the top.
Step 3 - Either enter part of the name of a Google API, “sheets” for example, or scroll to find it.
Step 4 - Click the API’s large button when shown.
Step 5 - On the next page click the API’s ENABLE button.
return to the APIs & Services page.
Below are Cyclr Connectors that require multiple Google APIs to be fully functional:
Google Sheets - Google Sheets API and Google Drive API
Additional Setup for Google AdWords
The Google AdWords connector requires additional setup before you can access its API.
Step 1 - Sign in or sign up for a Google AdWords manager account. This must be the top level owner account for your AdWords management.
Step 2 - On the navigation bar at the top of the AdWords manager page, go to Tools & Settings > SETUP > AdWords API Centre
Step 3 - Complete the form to create a developer token
Step 4 - Once you have created a developer token, go to Access level > Apply for Basic Access
Step 5 - Submit the AdWords API Token Application
Make a note of your developer token, you will need it when you use Google AdWords methods in Cyclr.
Please note you will not be able to use this connector with production accounts until Google has approved your application. This restriction does not apply to test accounts. If you wish to use the connector with test accounts, please follow the steps below:
Step 1 - Navigate to the Google Ads manager accounts page, and create a test manager account.
Step 2 - Use the Google Ads UI to create a test client account under the test manager account you created above. While logged in to Google Ads as your test manager account, any client accounts you create will automatically be test accounts.
Step 3 - Create a few test campaigns using the test client account.
Step 4 - Make note of the client customer ID for the client account, this is what you will enter when setting up the connector for testing.
Possible Issues with Refresh Tokens
There are a few situations that can cause the following error to occur when Cyclr attempts to refresh its Connector authentication details with Google:
{
    "error" : "invalid_grant",
    "error_description" : "Token has been expired or revoked."
}
This could be caused by the user that authenticated the Connector having changed their password, or your Google Project being in a “Testing” status while Google verify it which results in refresh tokens that are only valid for 7 days.
More causes can be found in Google’s Documentation.