
Connectivity Tools
Introduction
These tools make use of Cyclr’s Connectors framework to expose features you can use in your integrations. As a result, including them in your integrations counts towards the number of Connectors you have in use.
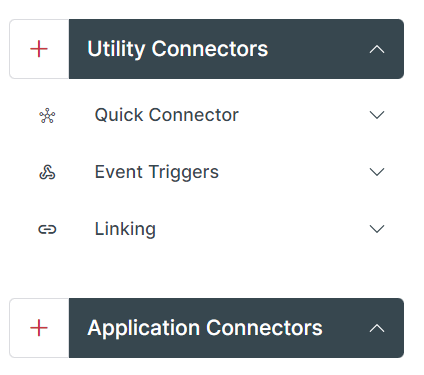
They are all available within Cyclr’s Builder under Utility Connectors:
Connectivity Tool | Purpose |
|---|---|
Enables creation of individual calls using its HTTP Request Steps, without needing to use an existing Connector or create a new Custom Connector. | |
Enables creation of individual Webhook Steps and - optionally - related Synchronous Response Steps that define the Responses sent back. | |
Allows you to link 2 integrations together. |
Quick Connector > HTTP Request
Purpose
The HTTP Request Step allows you to quickly setup a customized Step to make a call to an external system. This allows you to create your own custom Methods without needing to request a new Method to be added to a Library Connector, or to add one to a Custom Connector.
If you want a Method with more customization options, or for more extensive use, see the documentation on how to create a Custom Connector.
Custom Connectors may not be available in your Cyclr Console - for some Cyclr Price Plans it’s an additional feature.
All the details needed for Cyclr to make the request are set on the HTTP Request Step within its Step Setup popup:
the Endpoint to be called.
any HTTP Headers to include.
any Query string values to include.
the Authentication type and provide credentials.
whether the endpoint supports Paging and how it’s implemented by that endpoint.
the structure of the Request and Response data, depending on the HTTP Method type (e.g.
GET/POST).you can also use Script to modify the Request and Response data, if required.
Each HTTP Request Step is independently defined so if you wish to perform the same call again, you can either drag in a new HTTP Request and set it up in the same way, or copy the Template/Cycle it exists in for use in another integration.
Adding an HTTP Request Step
Within the Builder:
go to the Utility Connectors area on the right.
expand Quick Connector to show the HTTP Request.
drag it onto the Builder’s canvas.
Step Setup
After dragging an HTTP Request Step into the Builder, click its Step Setup button to configure it.
The Step Setup popup for an HTTP Request has tabs along the top where you provide details of how it will function.
Use the Previous and Next buttons at the bottom of the popup to move between tabs, or click a tab to jump to it.
As with other Steps, you can change the Step’s name and description by clicking on the default “HTTP Request” text in the top left of the popup. This helps you to identify what the Step does when viewed in the Builder.
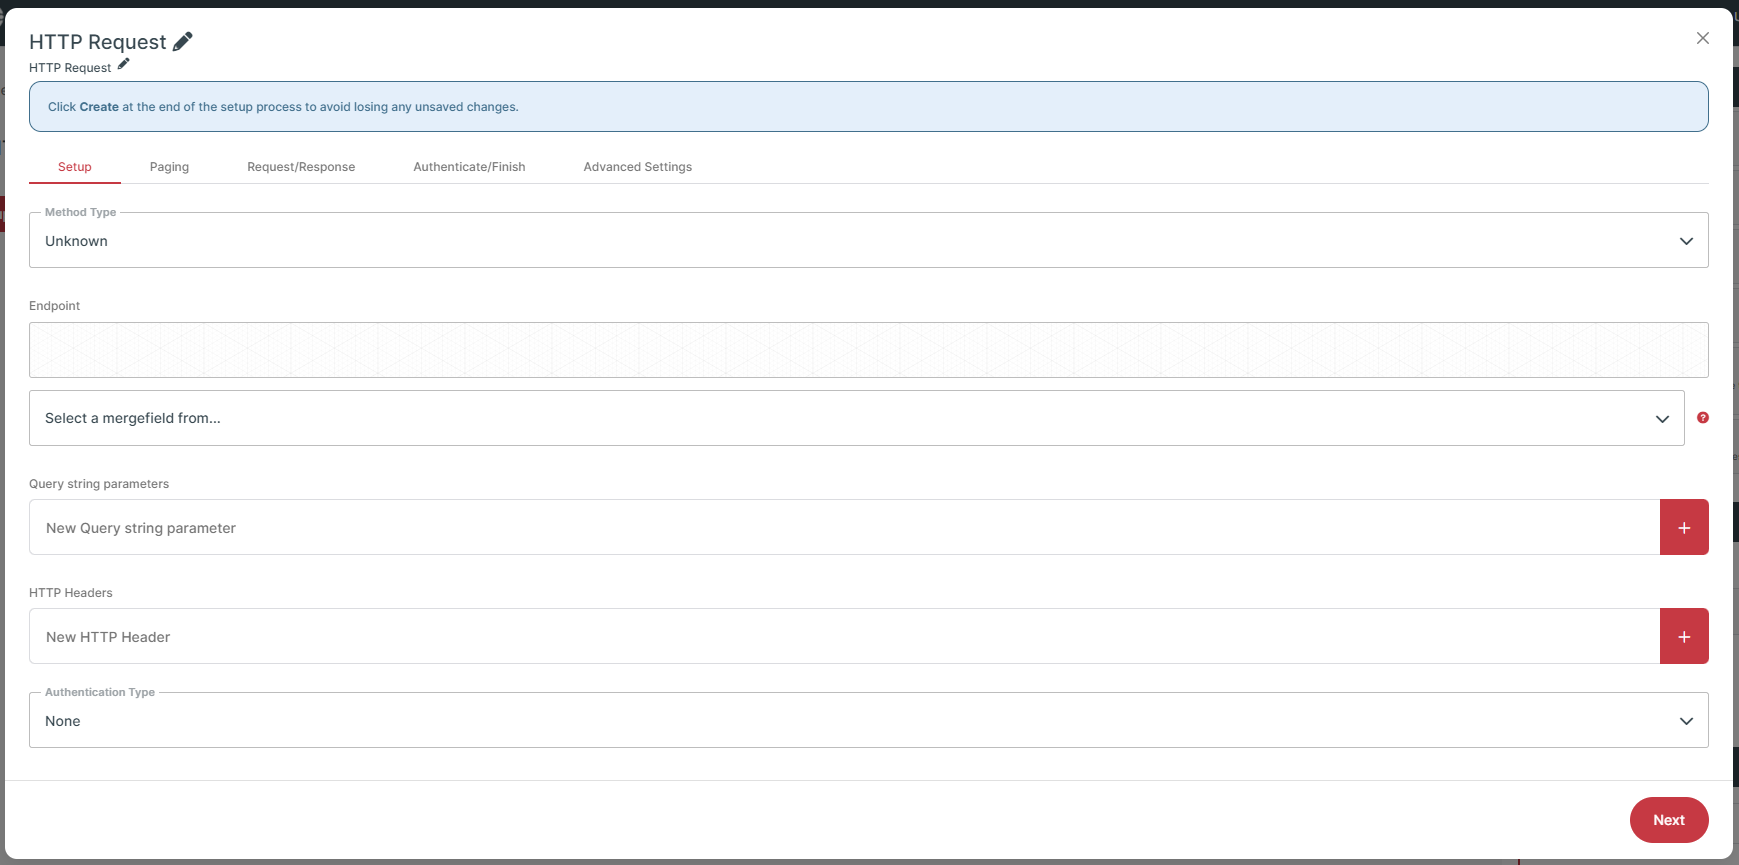
Setup tab
Here you define the fundamental parts of the HTTP call Cyclr will make when executing the Step.
Field | Description |
|---|---|
Method Type | The HTTP method type to use, e.g. |
Endpoint | The URL of the API endpoint to call. Can include Mergefields to insert values retrieved from previous Steps. |
Query string parameters | Add any Query string parameters to include in the request. Set their values by entering text or inserting Mergefields to use values from previous Steps. Supports use of Inline Script by prefixing with a |
HTTP Headers | Add any HTTP Headers to include in the request. Set their values by entering fixed values or inserting Mergefields to use values from previous Steps. Supports use of Inline Script by prefixing with a |
Authentication Type | Select the type of authentication the endpoint uses, e.g. ApiKey or OAuth2. Depending on the type selected, other options will be shown, e.g. choosing OAuth2 will then require you to select the OAuth 2 Type and provide additional URLs. |
Paging tab
The HTTP Request supports Inbound Paging. If the API endpoint you’re calling supports Paging - where you make multiple requests to retrieve all of the available data - you can enable that and set it up on this tab.
More details on the various API pagination techniques and how to implement them within Cyclr are explained in our Paging article.
Request/Response tab
Provide example JSON data into the JSON Request and JSON Response boxes which represents the data the Step can send and receive. Cyclr will automatically generate Request and Response Fields from that data, allowing you to map to them in this Step, and from them on subsequent Steps.
HTTP Request Steps currently only support JSON Request and Response data.
Authenticate/Finish tab
The Authenticate/Finish tab provides fields for you to enter any credentials to authenticate the step. These fields change dependent on the Authentication Type and Authentication Values that you select on the Setup tab.
For more information on authenticating connectors, you can view the Authentication section of the Cyclr documentation.
When working with an API that uses Bearer Tokens for authentication:
set the Authentication Type to “API Key”.
set the API Key Header to “Authorization”.
on the Authenticate/Finish tab, set the API Key to “Bearer[space]YOUR_API_KEY“, e.g.:
Bearer 0000-000-0000-000-00000
Select the Create or Update button on this tab to save any changes that you’ve made to the HTTP Request Step.
Cyclr will display a “Creating Quick Connector”message.
If you provided any example JSON Request, you’ll be moved to the Field Mapping tab to provide values for the fields.
Field Mapping tab
This tab shows any Request Fields defined from the data entered on the JSON Request box of the Request/Response tab.
Field Mapping works in the same way as for other Steps so you can set each Request Field by:
selecting Fields from previous Steps in your integration.
selecting Type a Value and entering:
fixed text values.
Mergefields from previous Steps.
Inline Script by prefixing it with a
=.
For more information, see the Cyclr documentation on how to map fields.
Advanced Settings tab
This area allows you to enter JavaScript code for the Cyclr Event functions to modify Request data before it's sent, or modify Response data after it’s received.
Event Triggers > Webhook
Purpose
This Webhook Step allows you to set up a webhook from inside the Builder without needing to install and set up a Generic Webhook Utility Connector. Instead, you can define the fields within the Webhook Step to create a webhook for a specific integration.
The Event Triggers' Webhook Step only supports JSON.
For a Webhook Step that supports XML and uses field auto-discovery, see the Generic WebhookConnector.
Adding a Webhook Step
Within the Builder:
go to the Utility Connectors area on the right.
expand Event Triggers to show the Webhook.
drag it onto the Builder’s canvas.
Step Setup
After dragging a Webhook Step into the Builder, click its Step Setup button to configure it.

As with other Steps, you can change the Step’s name and description by clicking on the default “Webhook” text in the top left of the popup. This helps you to identify what the Step does when viewed in the Builder.
The first field shown is the Webhook URL, which is automatically set by Cyclr. You can't change this value, but you can select Copy to copy it to paste into another system.
To define the fields you want to map on later Steps in your integration, enter an example of the JSON data structure the Webhook Step should receive into the Paste JSON box.
Once you have the data, select Save to create the fields.
When successful, the application displays a message stating “Fields created/updated successfully” in the bottom left of the screen. If the data isn't in the correct format, you’ll instead see an message with the error “Error: Invalid JSON”.
The Webhook Step only uses the example JSON to generate fields from. It doesn’t save the values you provided so may appear slightly differently to what was entered into the Paste JSON box.
Field Mapping
After you generate the fields for the Webhook Step with JSON, you can map these fields in subsequent Steps in your integration, according to how you want the Webhook Step to function. You map these fields in the same way as a standard Step. For more information, see the Cyclr documentation on how to map fields.
Event Triggers > Synchronous Response
Purpose
Allows you to specify the Response data that Cyclr will send back to an external system after receiving a POST Request on a Webhook Step.
If you only use a Webhook Step in an integration, when a POST Request is sent to its URL, Cyclr will receive the Request and then immediately close the connection with a standard Response, and process the data later.
If you include one or more Synchronous Response Steps in your integration, Cyclr keeps the connection open and allows you to define what information is sent back in the Response.
Read more on how Synchronous Responses work.
Adding a Synchronous Response Step
Within the Builder:
go to the Utility Connectors area on the right.
expand Event Triggers to show the Synchronous Response.
(only visible if your integration begins with an Event Triggers' Webhook Step)drag it onto the Builder’s canvas.
Step Setup
After dragging a Synchronous Response Step into the Builder, click its Step Setup button to configure it.
The Step Setup popup for a Synchronous Response has tabs along the top where you provide details of how it will function.
As with other Steps, you can change the Step’s name and description by clicking on the default “Synchronous Response” text in the top left of the popup. This helps you to identify what the Step does when viewed in the Builder.
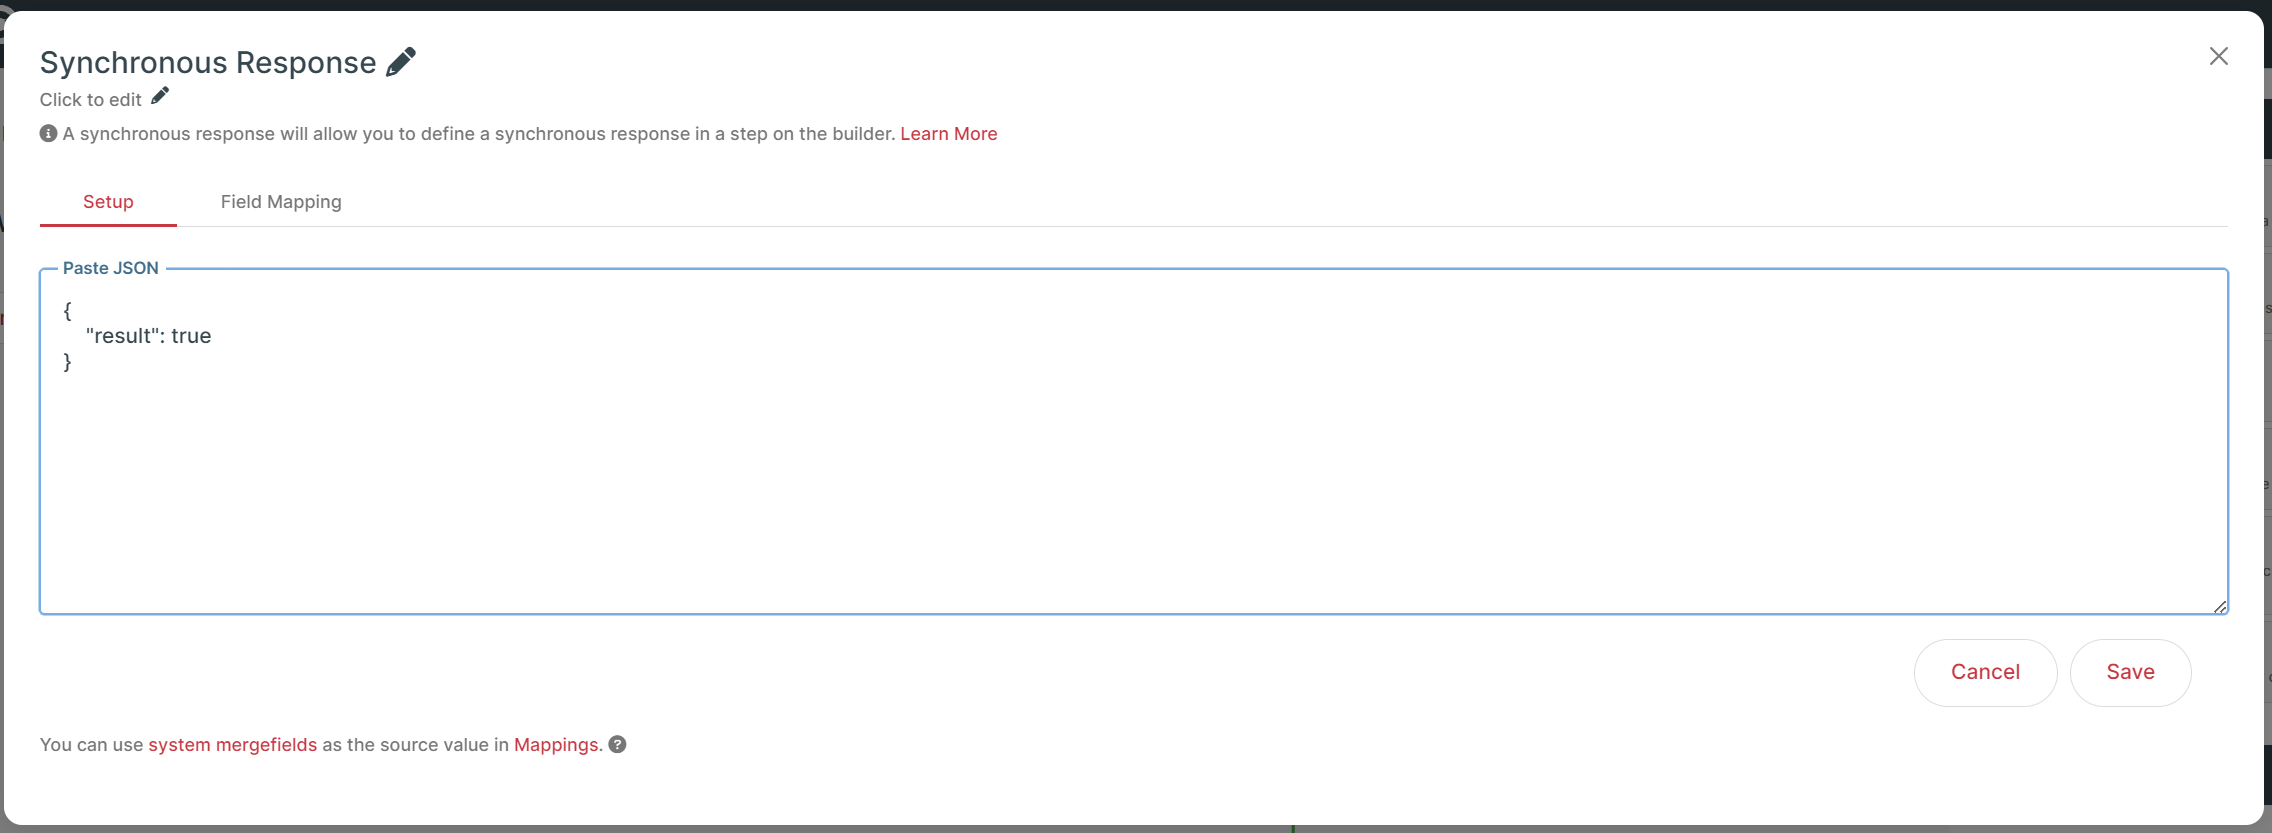
Setup tab
To generate the fields to use in the Response, enter data into the Paste JSON box then select Save.
You’ll be moved to the Field Mapping tab to provide values for the fields.
Field Mapping tab
This tab shows any Response Fields defined from the data entered on the JSON Request box of the Request/Response tab, allowing you to set what information is sent back to the external system that called the initial Webhook Step.
Field Mapping works in the same way as for other Steps so you can set each Response Field by:
selecting Fields from previous Steps in your integration.
selecting Type a Value and entering:
fixed text values.
Mergefields from previous Steps.
Inline Script by prefixing it with a
=.
For more information, see the Cyclr documentation on how to map fields.
Linking > Link To/From
Templates (and Cycles) can be linked by adding a Link To step that will act as the sending integration, then configuring it by defining a payload for field mapping and selecting an integration to link to (the receiving integration).
Once this step is configured, a Link From step will be available in the selected receiving integration’s Builder tools, which must be added to the receiving integration to complete the link.
Notes on use
Templates can be chained, A to B to C, or follow branching by using multiple Link To steps in a single template, A to B, A to C, or a combination of both.
When updating payload schemas in Link To steps in sending templates, the Link From step in the receiving template must be updated to use the new schema.
Likewise, when a receiving template has a new release, the Link To step in the sending template will need to be updated too, to link to the new receiving template release. So when promoting releases to Live, it's best to work backwards starting with the outermost receiving template.