
Templates
You can build Templates in Cyclr for integrations you wish to make available to your customers.
Those Templates can then be manually installed into your customers' Cyclr Accounts or offered to them to install and setup themselves, perhaps using Cyclr’s embedding features or Cyclr’s own API.
Template Library
The Template Library contains any Templates that have been created within your Cyclr Console.
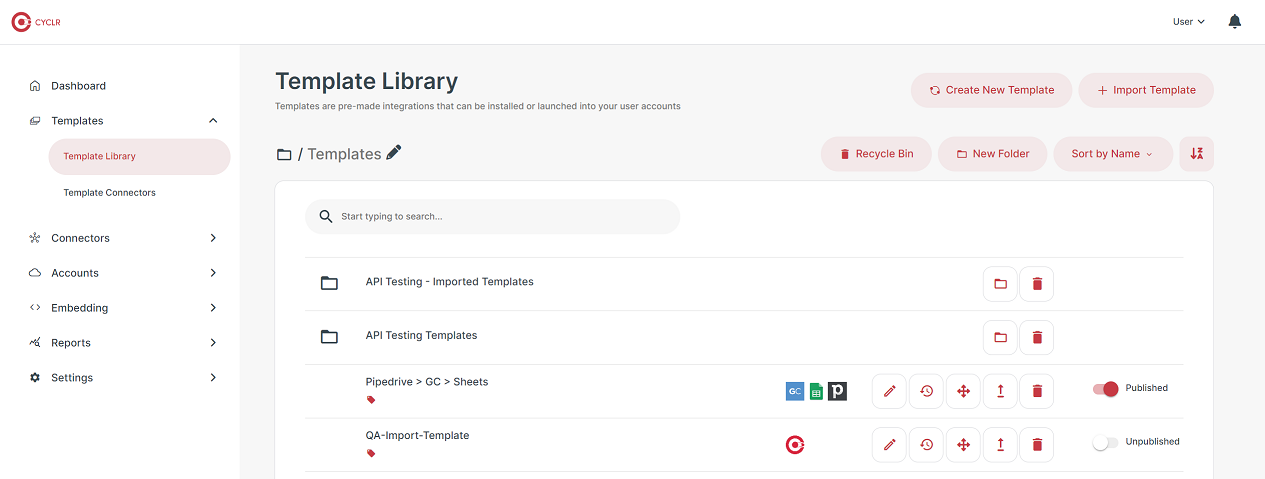
Templates may be Published and ready to be installed into your customers Cyclr Accounts, already installed, or perhaps still works in progress.
You can use Templates to prototype a planned integration you wish to make available to your customers, as well as to try things out.
Try to give your Templates good, meaningful names and make use of Folders to help organize them.
Once you have created at least one Template, you will see the options below next to each Template:
Option | Action |
|---|---|
Edit / View | This takes you into Cyclr’s integration builder to either edit or view the latest Template Release. If the Release is a Draft, you’ll be able to edit it. If it’s Live, then you’ll need to Copy the Template Release before you can make any changes. |
Releases | Shows all Releases of a Template. |
Move Template | Select to see a list of Folders you can move a Template into. |
Upgrade Installed Integrations | Upgrades Cycles in your Accounts that were installed from the Template. |
Delete Template | Places the Template into the Console’s Recycle Bin where it can then be completely removed. Deleting a Template will NOT affect Cycles in your Accounts that were installed from the Template. |
Published / Unpublished | To enable a Template to be installed into an Account - whether through the “Templates” button within an Account or through the LAUNCH and Marketplaces features - set this to Published. |
Tagging Templates
You can add Tags to your Templates through the list view of your Template Library. You can also add Tags to Cycles within Accounts.
These Tags can then be used as additional information for yourself and your colleagues.
When addded to Templates, you can also use them to filter which are returned when making calls to certain Cyclr API endpoints, as well as by LAUNCH when displaying Templates for your customer to choose from.
When a Template is installed into an Account, any Tags on the Template will be copied onto the newly created Cycle.
Managing Tags
For Templates, go to your Partner Console, then the Template Library and locate a Template you wish to Tag.
Managing Tags on a Cycle within an Account is handled the same way.
The ![]() icon beneath each Template shows any existing Tags set on it:
icon beneath each Template shows any existing Tags set on it:
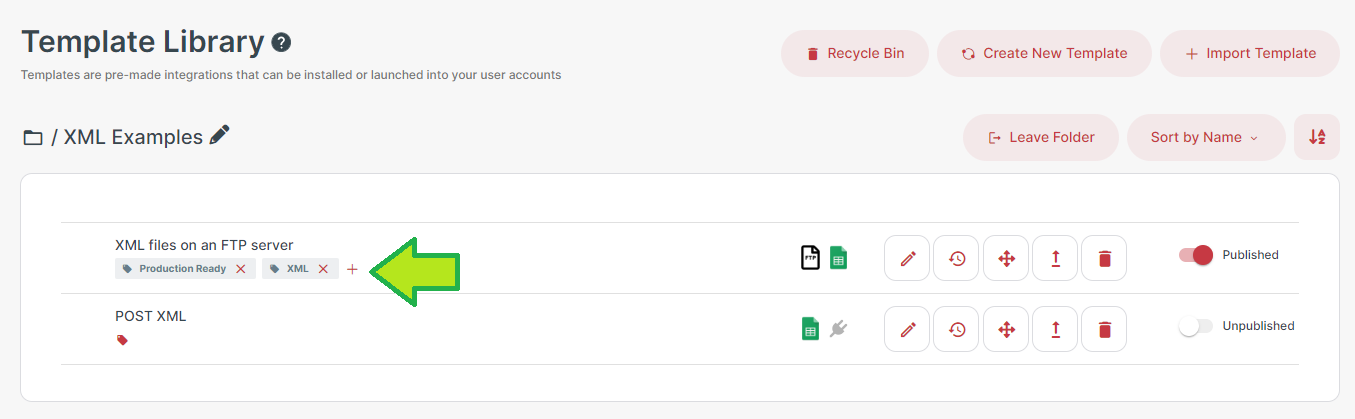
Delete a Tag by selecting the ![]() button next to one you wish to remove.
button next to one you wish to remove.
To add Tags to a Template, select either the ![]() or the
or the ![]() button to open the Tagging popup:
button to open the Tagging popup:
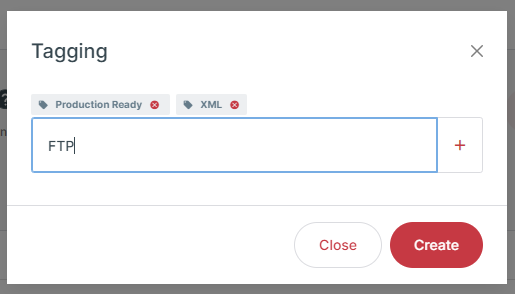
Prepare a new Tag to be added by entering some text for it and selecting the
 button.
You can add one or more Tags in the Tagging popup.
Remove Tags from here by selecting the
 button.
Select the “Create” button to save the new Tags to the Template.